Creating your first email drip is daunting. (Where to begin?)
So, I’m giving you a starting point.
The concept
Here’s the scenario: you have permission to email a segment of prospects, and they are new to your company. Maybe these are prospects from a trade show.
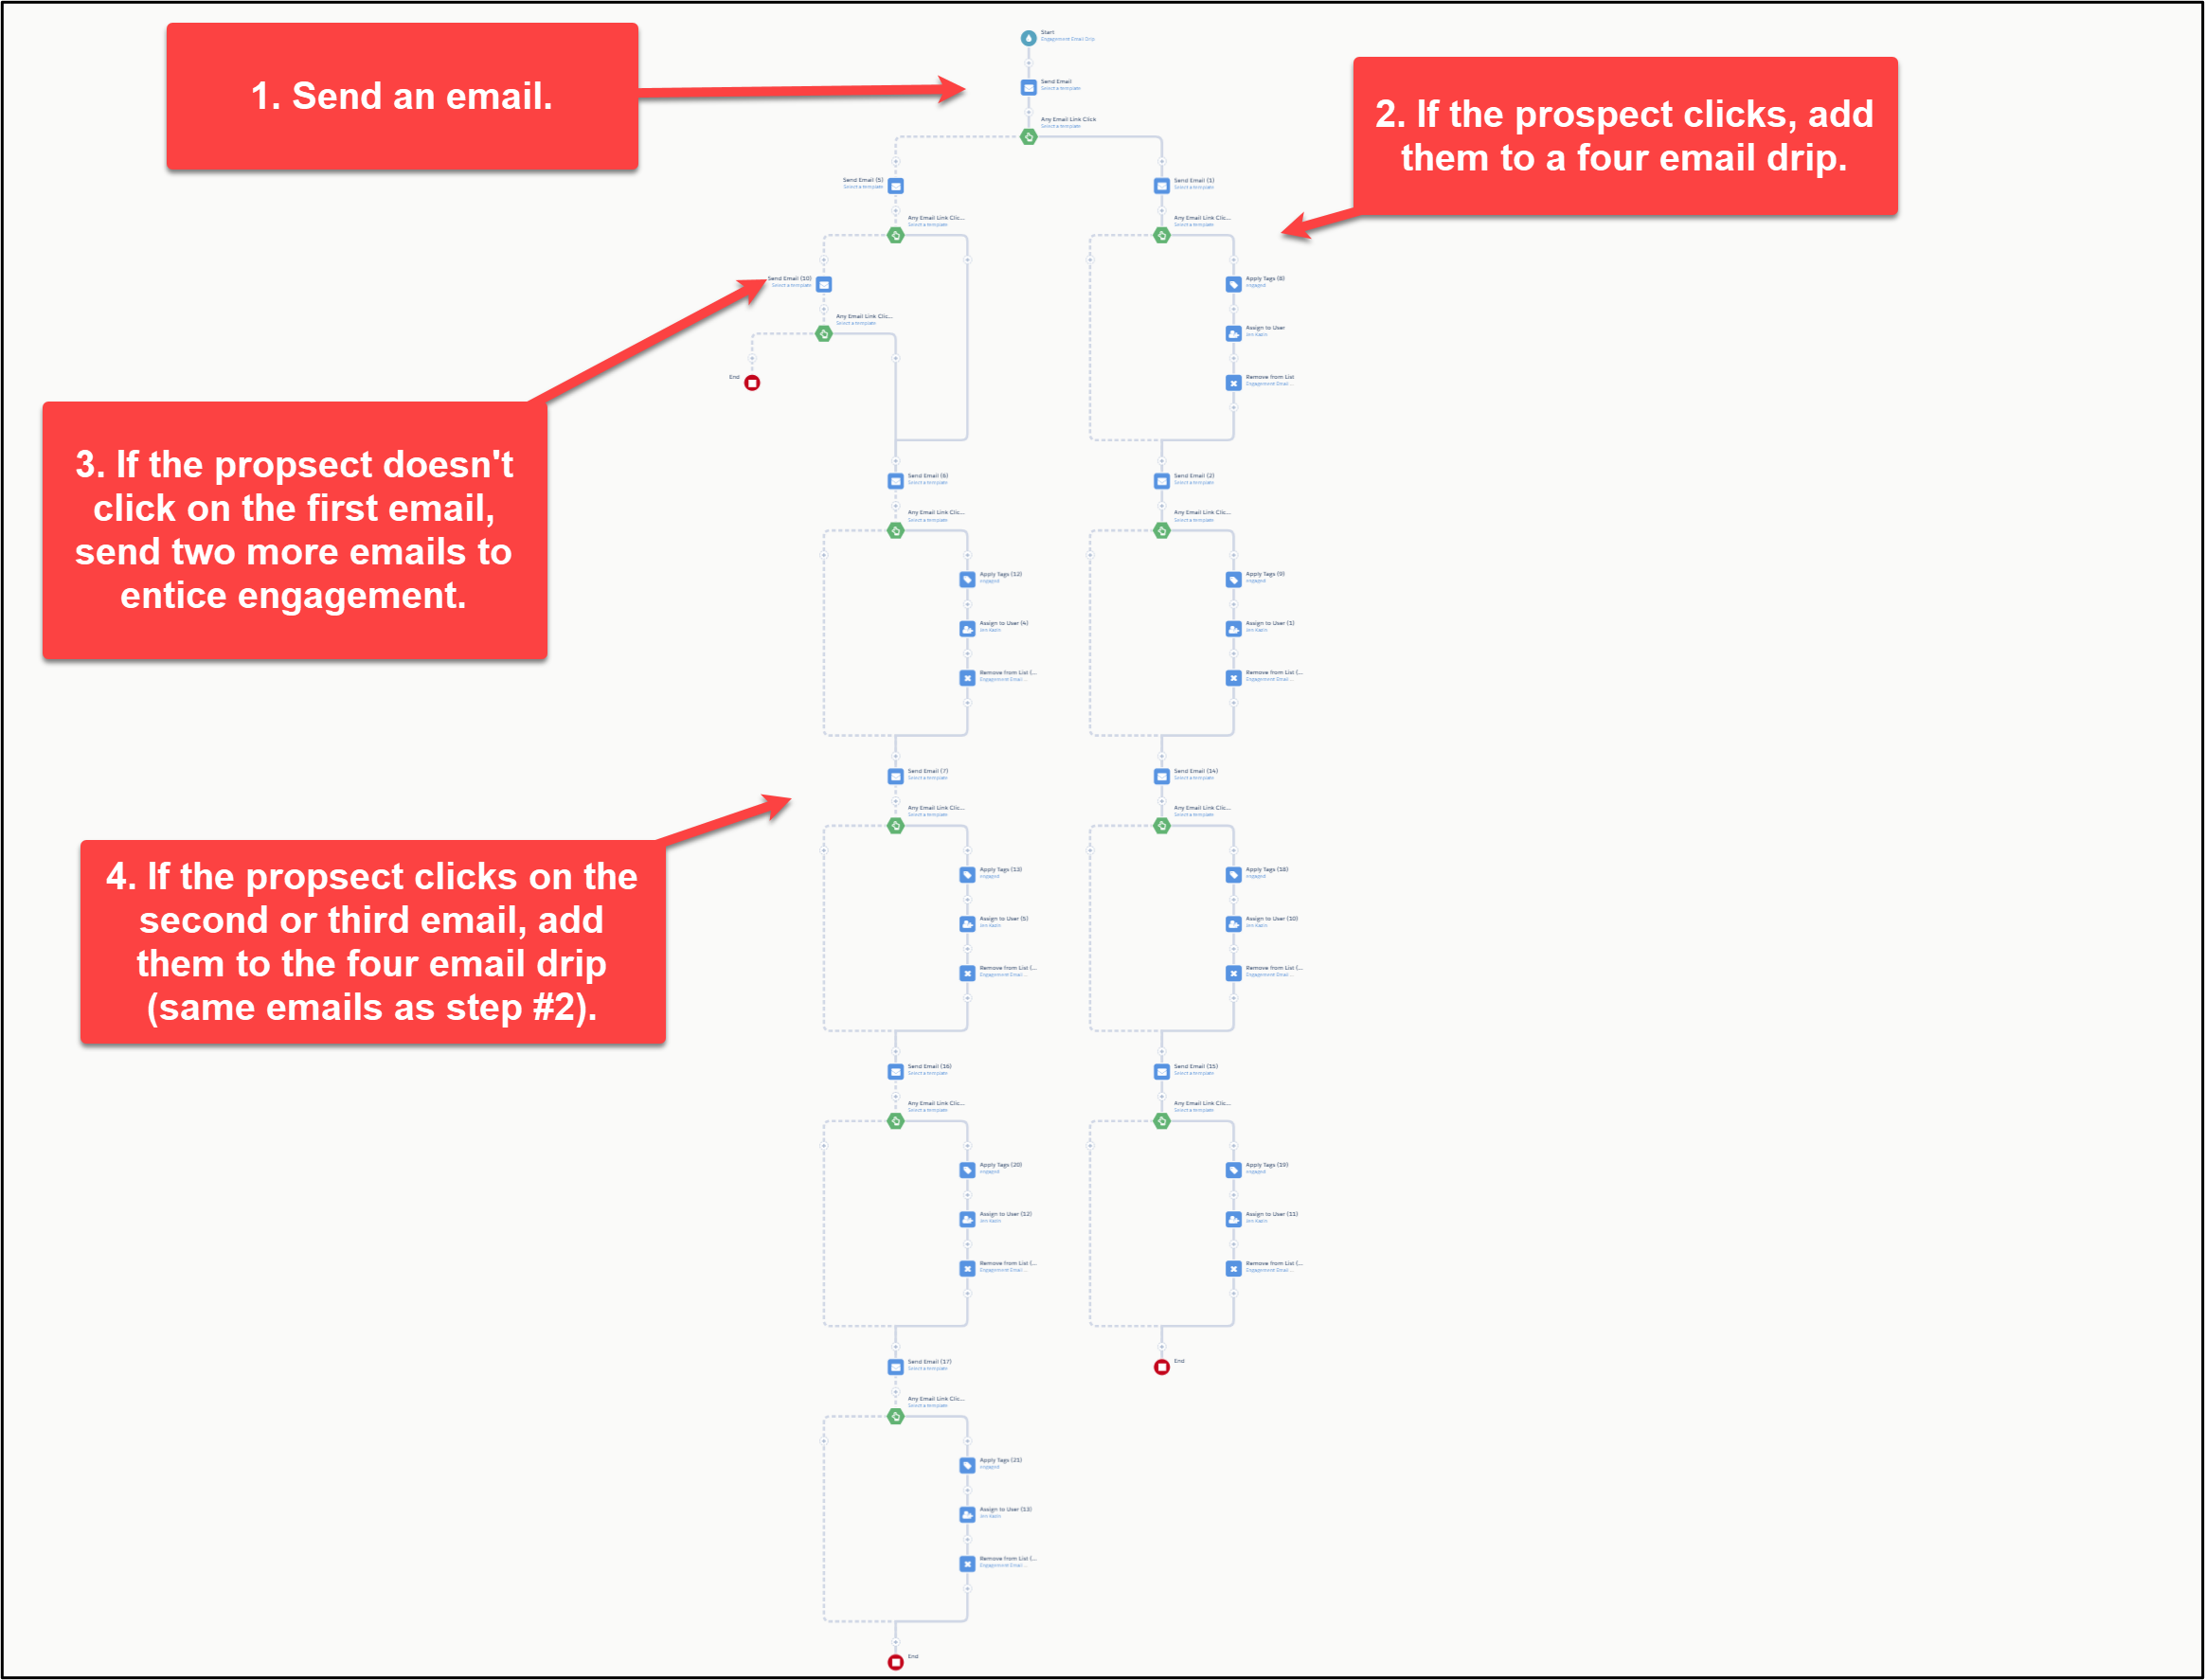
We are going to send five emails- one every week.
I’m looking for prospects that click twice. After the second click, I will assign them to a salesperson. (This could be debated. I like to set the bar to get high-quality prospects. If an email click is a rare occasion for your company, assign the prospect after one click.)
First Step
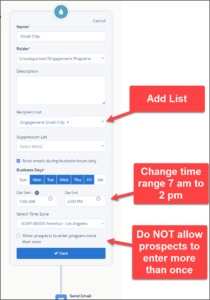
Go to the Automation tab and select Engagement Studio. Click “Add Engagement Program.”
Click on the water drop.
Second Step
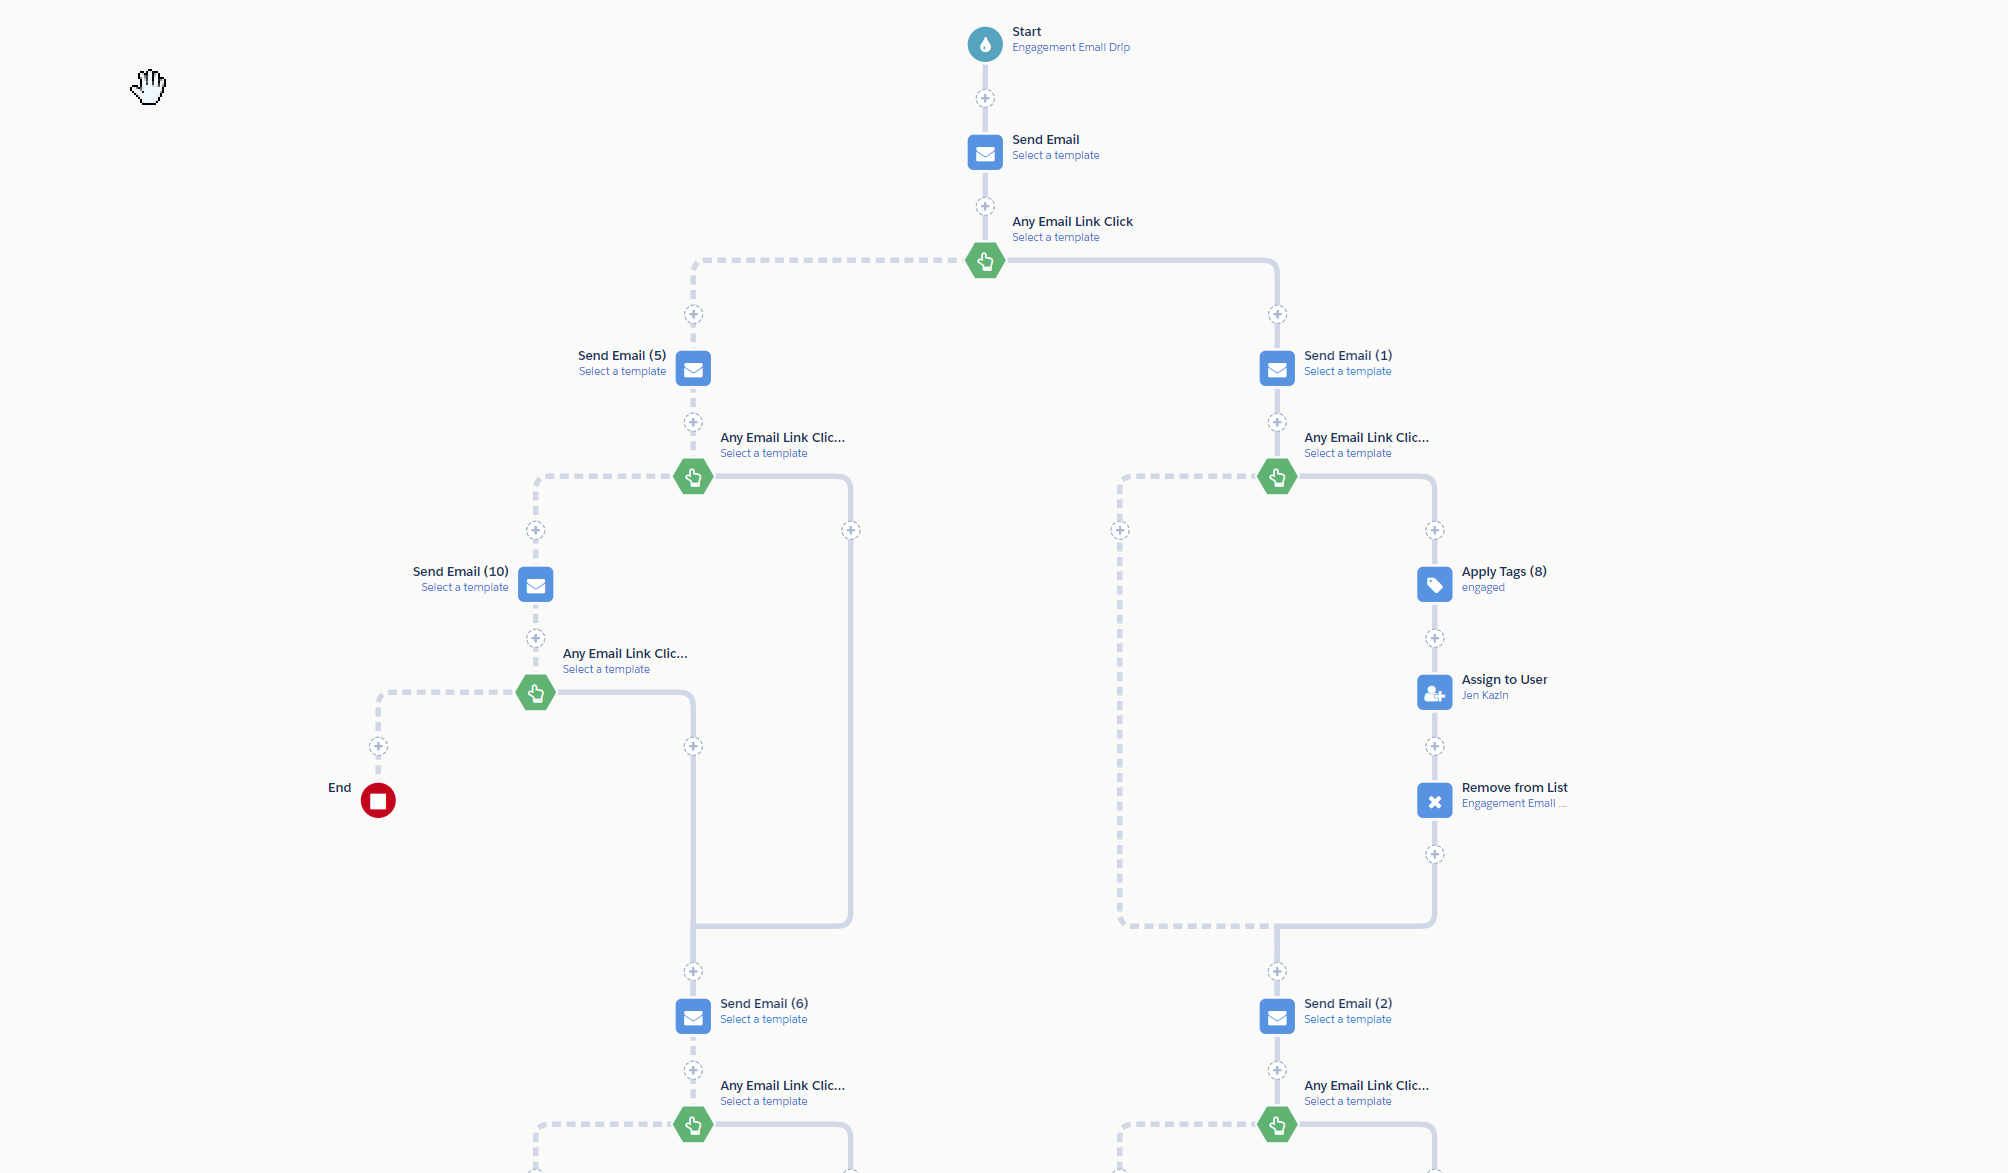
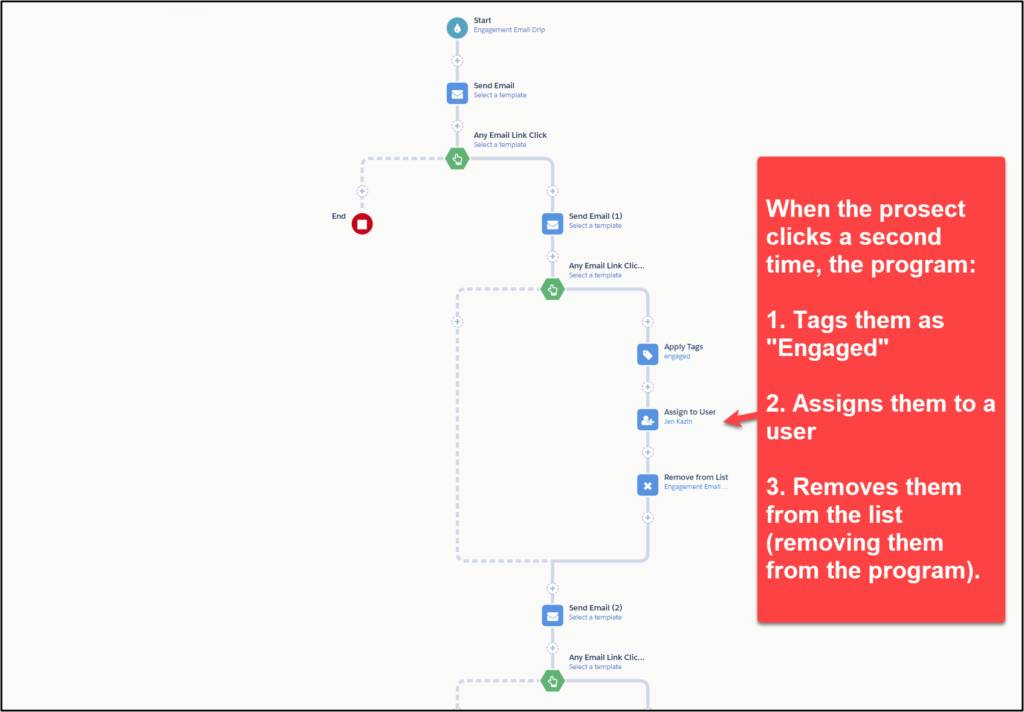
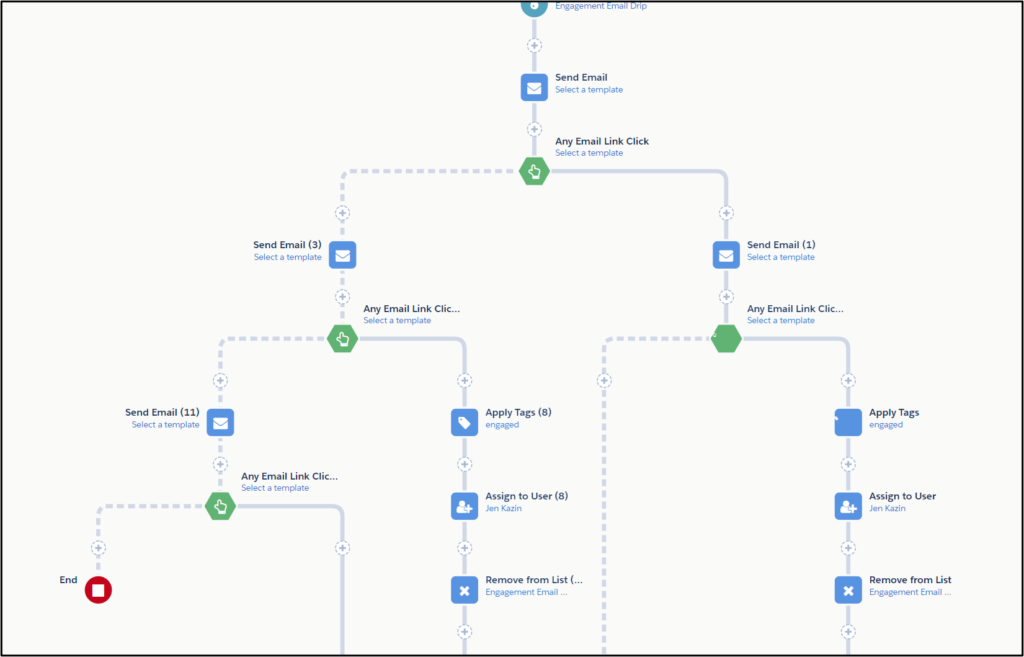
Begin building out the right branch. Begin with an email, followed by a trigger of “Any Link Click.”
Follow the image (below), including adding tags and assignments and removing prospects from the list if they click a second time. Repeat the sequence for a total of four emails.
Third Step
Now that the right branch is complete build the left side of the engagement program.
Fourth Step
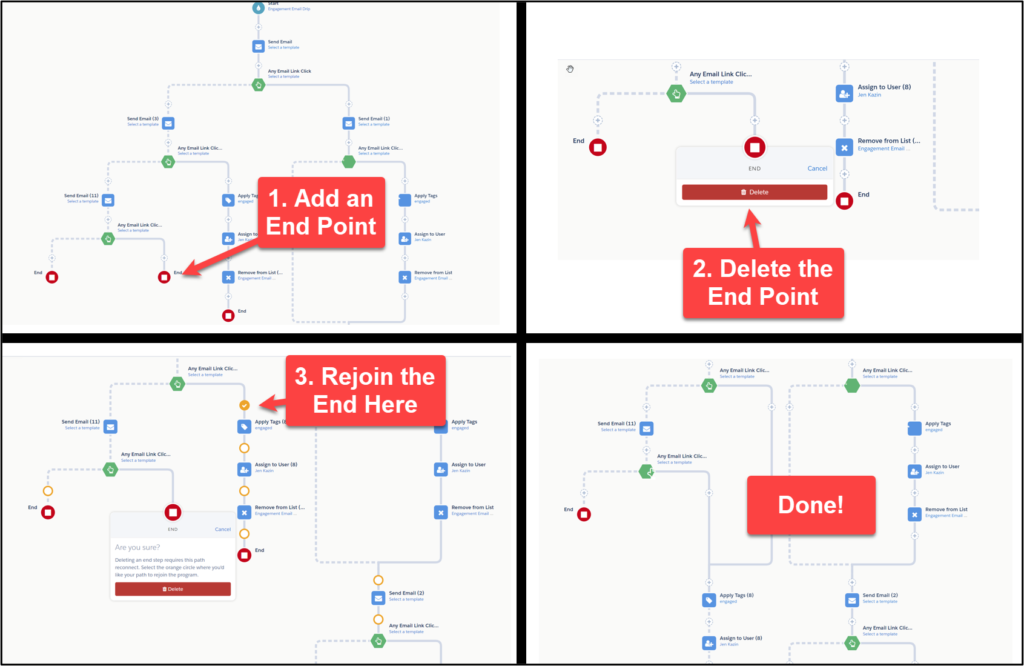
There is one tricky part. To rejoin the branch after the third email, follow the steps below.
Viola!
And more!
Additional tips:
- Strive to design your email content to get the click. I see many drab emails and marketers wondering why they have low engagement. Here is a blog about how to get clicks.
- Put your best content first. The first email should be your best stuff.
- Consider applying a tag at the beginning of the engagement studio and remove the tag before exiting. This helps you track who’s in the engagement program.
- Add a tag with a year-long wait period at the very end. This keeps the engagement studio open if you want to add additional emails later.
