Account Engagement’s resubscribe feature is golden. It lets an unsubscribed prospect opt back in again after they fill out a form.
Resubscribe works great – if you use Account Engagement forms.
But, oh… you use form handlers. Sorry.
I see many companies using form handlers, and none of them have a resubscribe process.
One solution is to use form handler completion actions to trigger an autoresponder with conditional HML. This gives you the same capability as the out-of-box resubscribe.
Follow this blog, and you can have a resubscribe button in five steps.
(This idea came from Bill Fetter, but I like it so much I’m providing a step-by-step blog. Check out Bill at https://www.unfetteredmarketing.com/)
1- Resubscribe
First, you need to set up Account Engagement’s Resubscribe. (Upgrading to Handlebar Merge Language (HML) is a prerequisite). You can read more and follow the steps here. Salesforce provides a resubscribe email template.
2- Create Custom Fields
Next, you need to create a Account Engagement custom text field to resubscribe work for Account Engagement form handlers.
You will use this field with conditional HML to trigger the autoresponder. I recommend naming the custom field “Opted Out-Resubscribe” (so you don’t confuse it with the default Opted Out field). You do not need to sync this Account Engagement field with Salesforce.
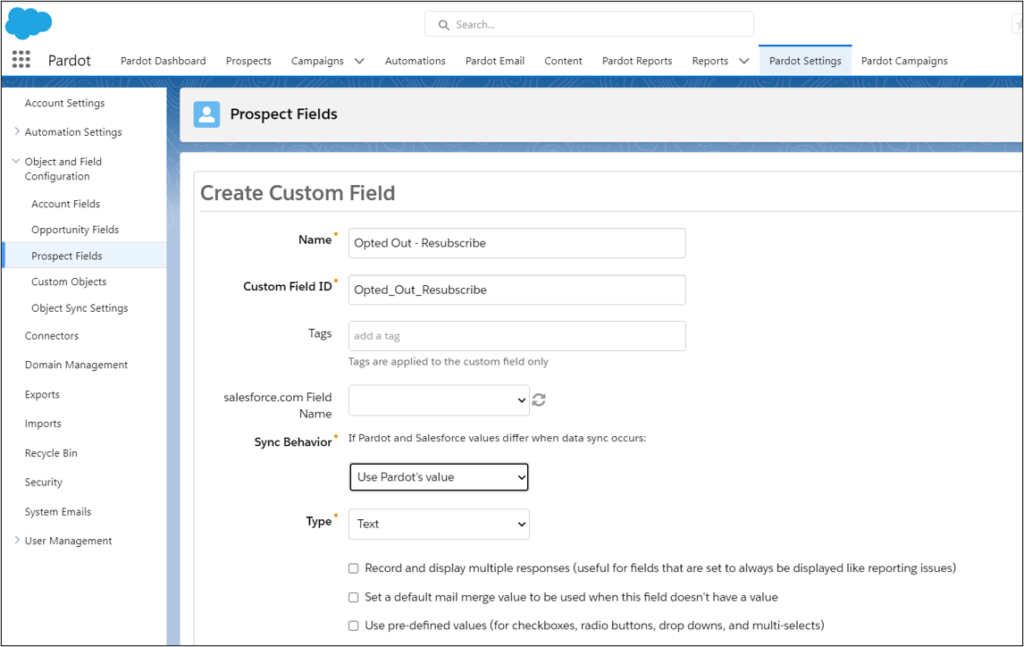
3- Create Automation Rules
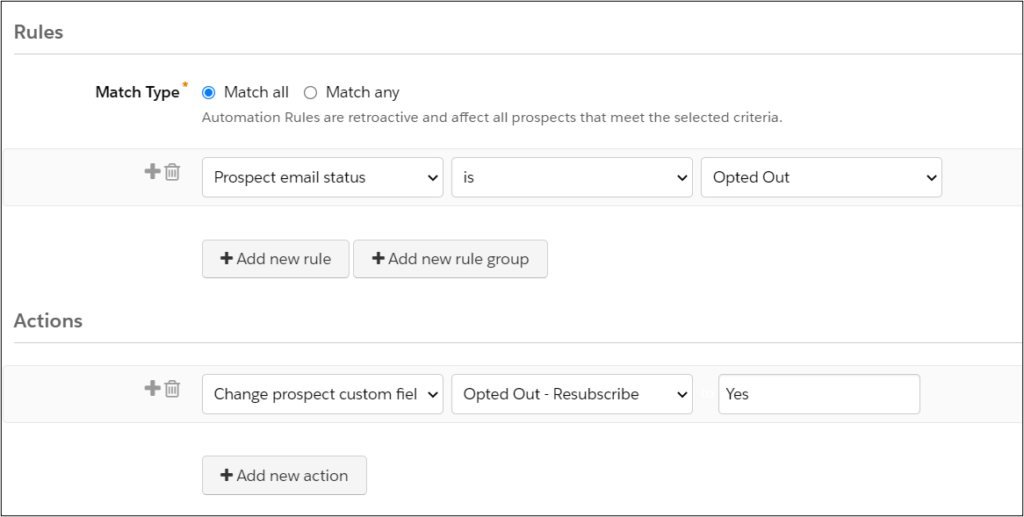
Now, we need to build two automations to make the resubscribe work.
The first automation will find any prospects with email status Opted Out and update the new custom field (Opted Out – Resubscribe) to “Yes”.
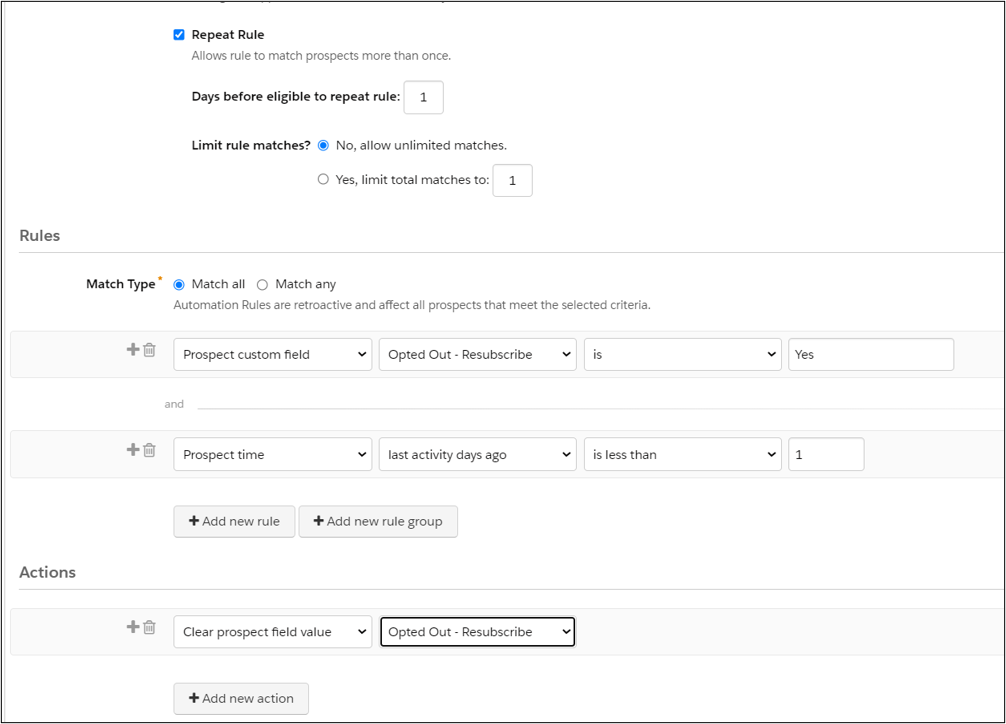
The second automation clears this field after they opt back in. Clearing the field is essential for the handlebar merge language to work. Conditional HML requires data vs. leaving the field blank.
Set this second automation rule to repeat. Because you don’t want it running against everyone in your Account Engagement database every day, set a time parameter.
4- Create a Account Engagement autoresponder email
Go to Account Engagement Email tab > Templates. Click + Add Email Template. Add the basic template information, including name, folder, campaign, etc. At the bottom, make sure it’s available for autoresponder emails. Select the resubscribe template, or use one of your own.

Now, you need to add conditional Handlebar Merge Language (HML) to the message on your autoresponder email. This will only show if the prospect Opted Out Resubscribe custom field contains yes; otherwise, it shows nothing.
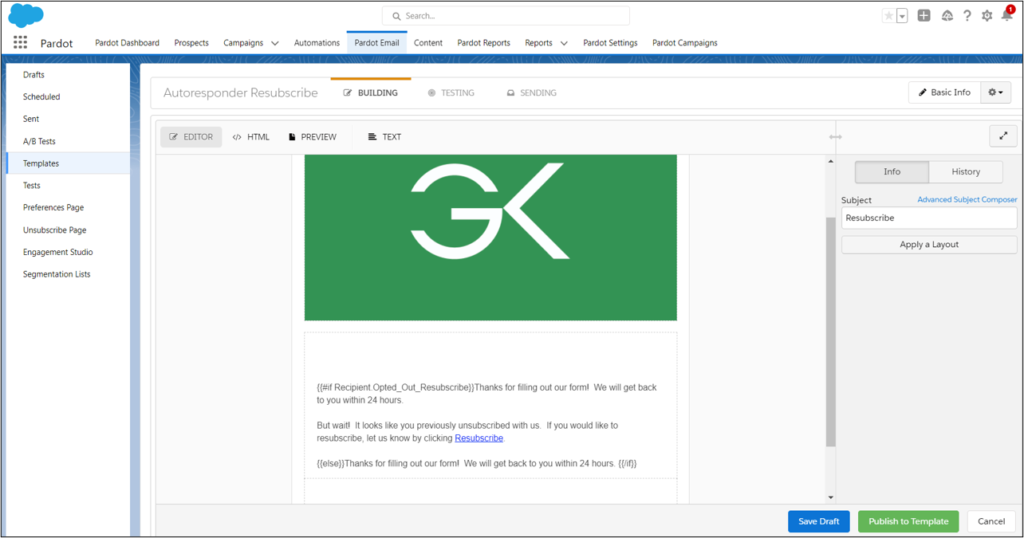
If you are unfamiliar with Handlebar Merge Language (HML), click here to learn more. Or, you can blissfully copy mine below. 😊
_____
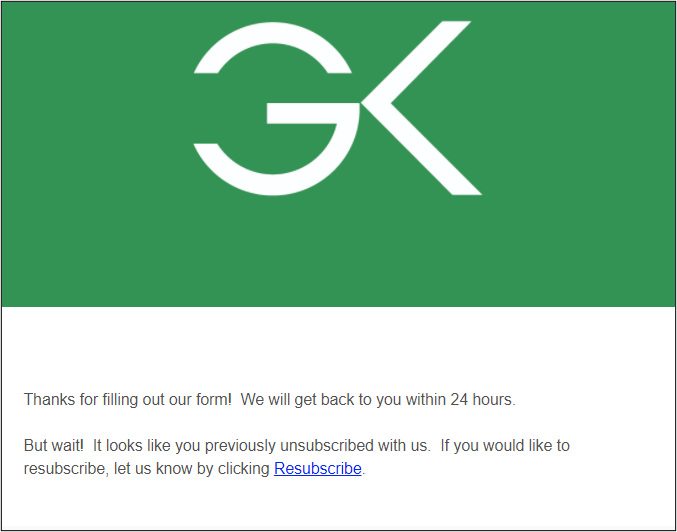
{{#if Recipient.Opted_Out_Resubscribe}}Thanks for filling out our form! We will get back to you within 24 hours.
But wait! It looks like you previously unsubscribed with us. If you would like to resubscribe, let us know by clicking Resubscribe.
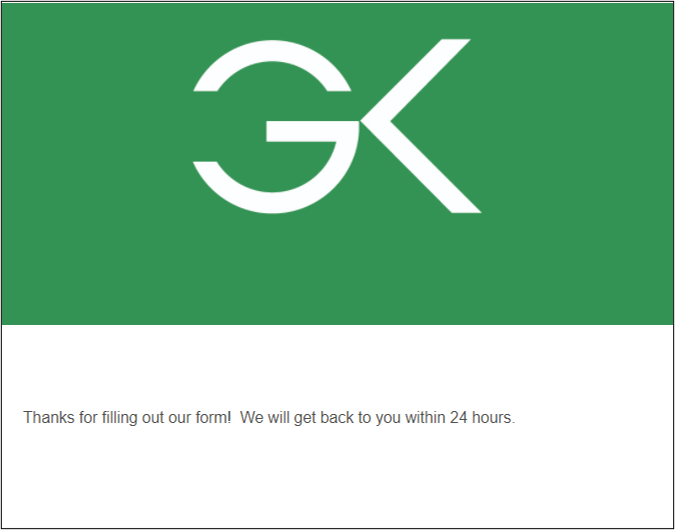
{{else}}Thanks for filling out our form! We will get back to you within 24 hours. {{/if}}
_____
Don’t forget the last step: Set Your Sender Details and publish your template.
Here’s how it works
If your prospect’s “Opted Out – Resubscribe” field = “Yes”, she will see this:
If your prospect’s “Opted Out – Resubscribe” field is blank, she will see this:
5- Create Account Engagement Form Handler
Lastly, create the Account Engagement form handler and add the completion action for the autoresponder.
Salesforce documentation is here.

Go to Content > Form Handlers > Add Form Handler. Add the form handler name, folder, and campaign > Click Next.
When you add form fields, make sure that you are using the exact external field names (they are case sensitive).
NOTE: While you can make the email field required, a best practice is to leave all other, additional fields as Not Required. (You can make the fields required on the original form.)
Add autoresponder in form handler completion actions.

Grab the form handler code and good luck!
