Last week I bought hockey laces for my 12-year old son, and now I get daily marketing emails about pucks, helmets, and hockey sticks.
Hmph.
I don’t play hockey.
Where’s the unsubscribe link?
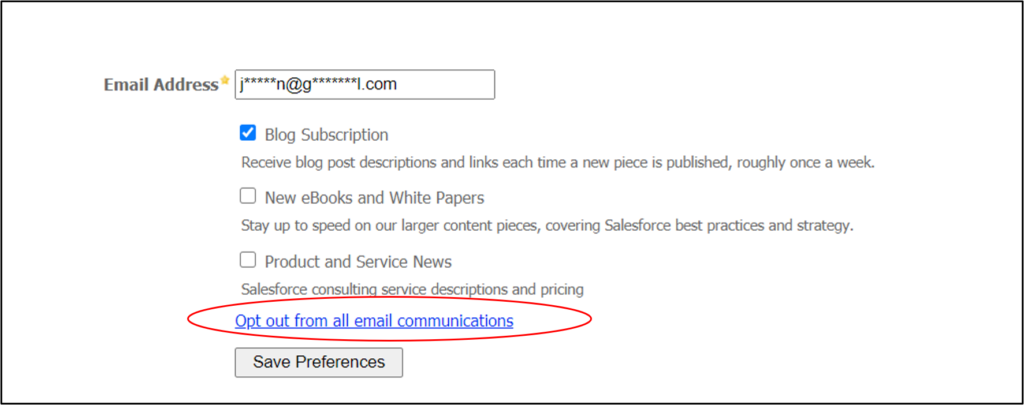
Wait, I see a list of choices. I can select how I want to get the hockey company’s emails.
Smart! They use a preference center.
Preference Centers defined
With a preference center, prospects can change their email subscription details. For example, they can opt-in or unsubscribe from different email streams and choose the frequency of email they want to receive from you.
Preference centers:
- Reduce unsubscribes
- Allow you to send more customized emails to prospects for better email engagement.
- Teach you about your audience
- Showcase your email offerings
Plan your list management
When you use a preference center, you promise to send only specific emails to your subscriber. Now, you need to set that up in Account Engagement.
Here’s a quick exercise to get organized, and it helps in getting marketing team consensus.
1. Think of all the emails you send in a month- either the past month or the coming month. Write them down.
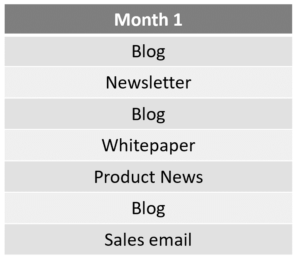
2. Now, expand to three months (or longer). Write down all the emails.

3. Do you see common themes? If so, can you group them?

In this example, the company could have email preference center choices for:
- Blog
- Newsletter
- Product News & Whitepapers
These lists become the foundational email lists for your marketing team. Your public lists should be the starting point for all your email list sends.
Dynamic list vs. Segmentation list?
Now that you have your lists, you need to decide if you want to use dynamic lists or segmentation lists in your preference center. While a dynamic list is convenient, many marketers like segmentation lists because prospects can select and deselect list membership.
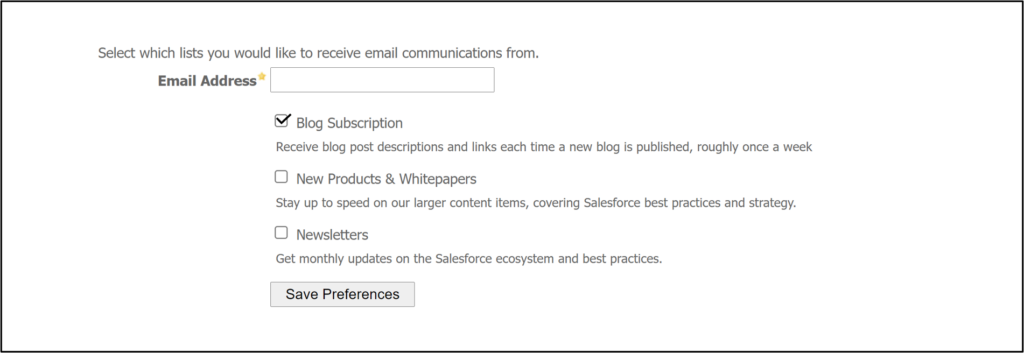
Three public lists as Segmentation Lists
When you use segmentation lists, prospects can check and uncheck to add or remove themselves from the lists.
Three public lists as Dynamic Lists
With dynamic lists, prospects will only see their subscribed lists, and they can only uncheck themselves to remove themselves from the list. When a prospect opts out of a dynamic list, they stay on the list, but they don’t receive emails sent to the dynamic list.

Lists Name and Descriptions
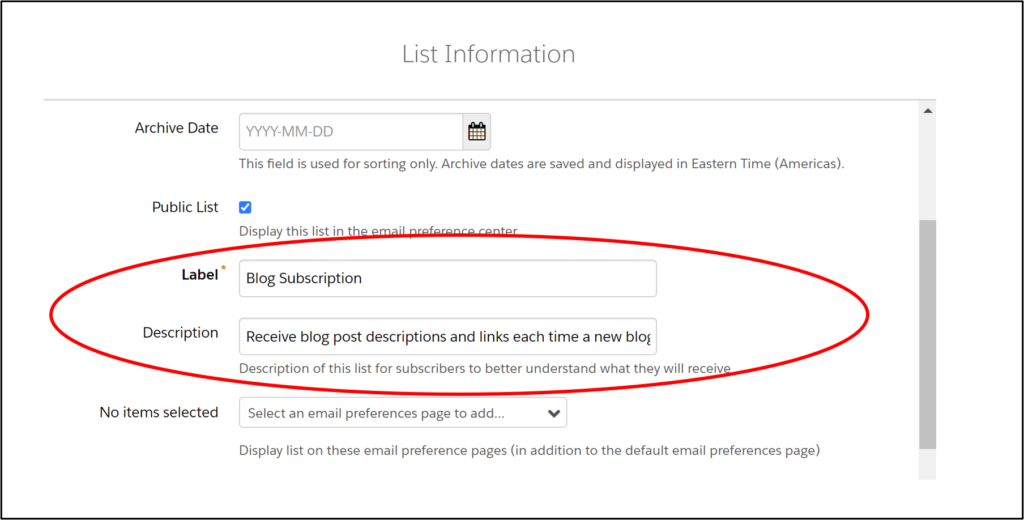
To add lists to the Preference Center, create a segmentation list but choose the “Public List” checkbox. This will automatically add the list to the default Preference Center.
A best practice is always to add a meaningful description, including the frequency of when you send emails.
How to create a preference center
- In the Lightning app, select Account Engagement Email and then Preferences Page.
- Enter a name, title, and campaign. (The name is for internal Account Engagement use only.)
- Select a layout template.
- Account Engagement automatically adds all public lists to the default preference page.
- Customize the Form Content section.
- Customize the Thank You Content. This content is displayed when the prospect submits changes.
- When finished, click Create Page.
- After creating the custom page, you can use it in an email by adding the email preference center tag to your email template.
Source: Salesforce How to Create a Custom Preference Center
How to use dynamic lists to create sub lists
You need to use your public lists for email sends now that you have a preference center.
(This is a critical section!)
Let’s go through an example.
You have a public list called “Product News and Whitepapers” on your preference center. Now you need to send an email about a product change that only affects prospects in the state of Minnesota. You should create a dynamic list that starts with your public list and segment from there.
Use the “Prospect public list opt-in status” dynamic list criteria.
Prospect public opt-in status > is not opted out > Preference Center – Public List

You can also use a this dynamic list criteria to create a suppression list.
Prospect public opt-in status > is opted out > Preference Center – Public list.

Here’s another example:
You want to send out a holiday card. Think about which public list makes the most sense to use. Is the list description on that public list appropriate so your subscribers won’t get upset?
To clarify, your public lists become a critical aspect for all (or most) of your email sends.
Global opt-out still available
As you plan your preference page, remember that Account Engagement still provides a global opt-out at the bottom of the preference center. (Whew! You’re covered!)
Customizing your preference center
I see many drab, unbranded preference centers. At least add your logo in the formatting section.
This gives your prospects a consistent brand experience.
Your prospects were probably on your branded website; then they saw your branded email. Continue the brand experience by adding your logo to your preference center.
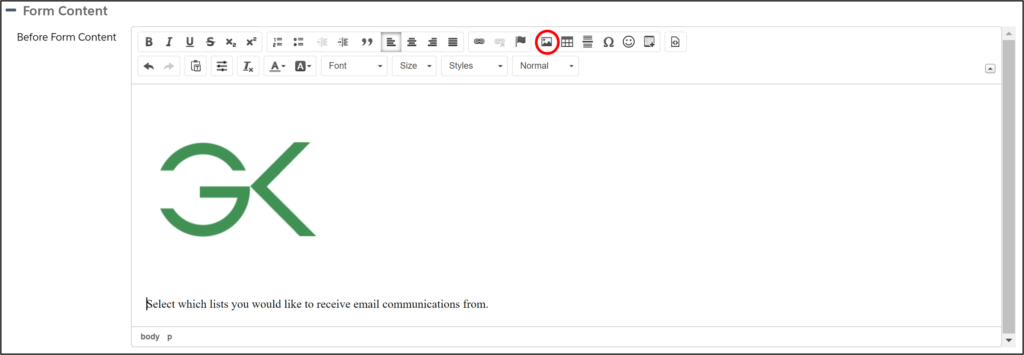
Or check out Jenna Molby’s blog to learn how to customize your Account Engagement email preference page.
Ordering your lists
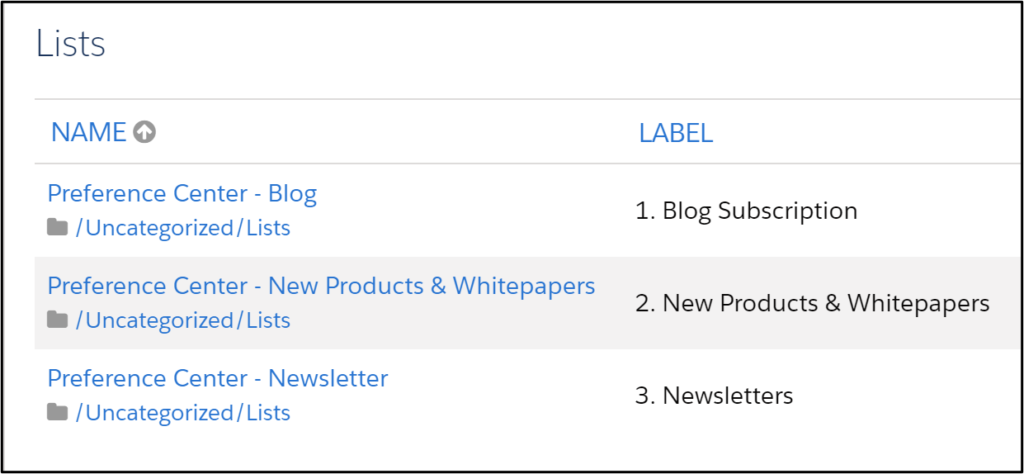
Preference center lists are ordered alphabetically according to the list name. To change the order, rename your Lists with numbers:
Opting people back in
You cannot change a prospect’s opt-out status once they have opted out from a public list.
The prospect needs to change their subscription using the preference center.
(Bummer.)
Testing
To properly test the preference center, add yourself to a public list and send a test list.

Using multiple preference centers
If you need more than one preference center, it’s no problem!
In the preference page section, choose “Add Email Preference Page.”

You can pick the public lists to appear on the preference page with custom preference pages. (All public lists will display on the Account Engagement default preference page.)

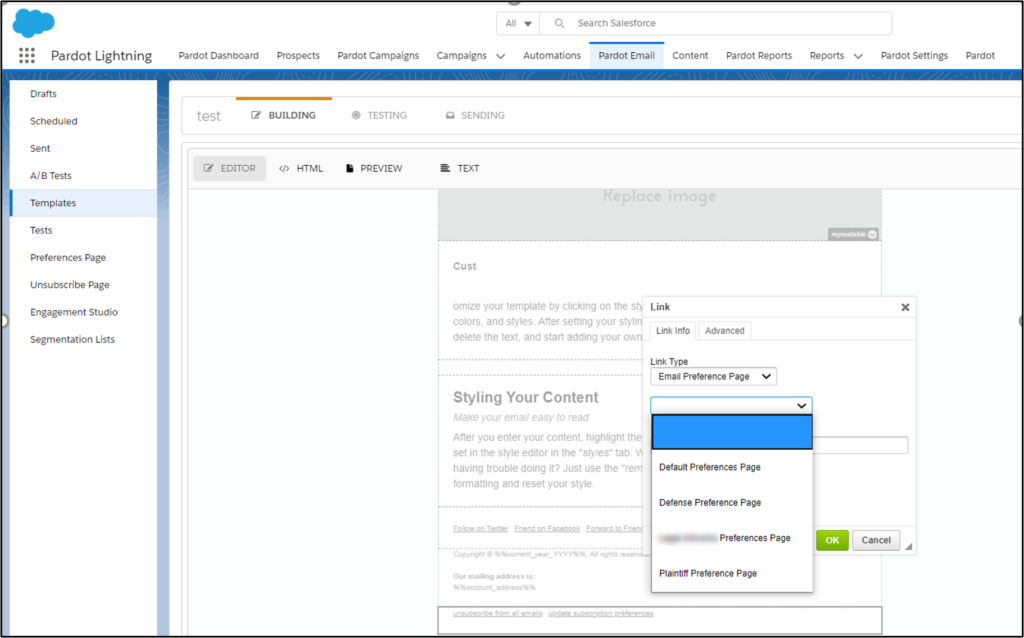
Choose which preference center you want to use in the email with the Link Type dropdown. If you want to use a custom preference page in the new Email Builder, check out this video.
