Hey there!
Glad to see that you are ready to set up the new Email and Landing Page Builders, the future of marketing in Account Engagement.
The Email and Landing Page Builders allow marketers to create basic, drag-and-drop templates.
Let’s go!
Setting up Account Engagement Email & Landing Builders
If you prefer videos, watch me set up the Email & Landing Page Builder in 10 MINUTES!
NOTE: Go to Setup > CONTENT SETUP to get started. (This video shows still uses Setup > Email Setup and will be updated shortly.)
To start, go to Salesforce, choose Setup, and in the QuickFind Box type CONTENT SETUP.
Follow the predefined steps.
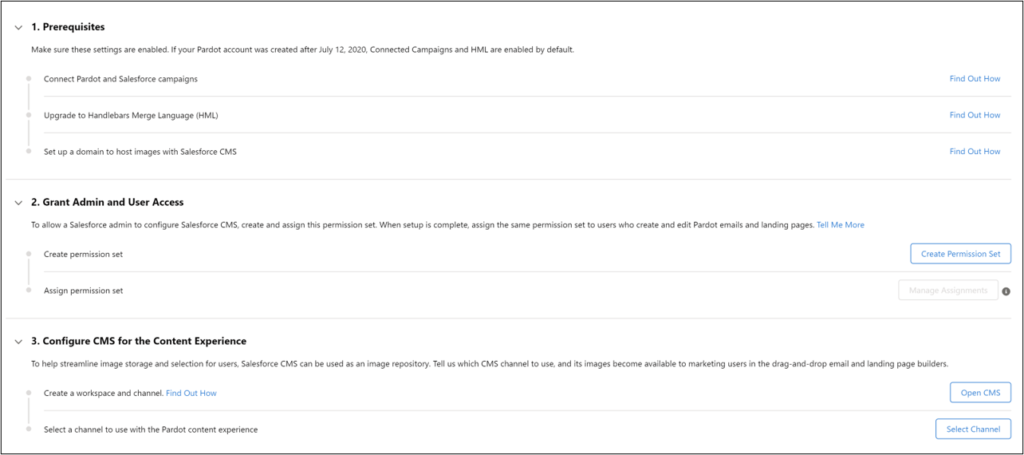
1. Prerequisites
If you are missing the prerequisites, you’ll need more time. Here’s what you need:
- Enable Account Engagement for Lightning
- Complete connected campaigns
- Turn on Handlebar Merge Language (HML)
(Contact me if you need help in any of these areas.)
2. Grant Admin and User Access
Next, click on “Create Permission Set” and assign the new permission set to the correct users.
Once you create the permission set, you need to choose Manage Assignments and add the necessary marketers to the new permission set.

3. Configure CMS for Email
CMS stands for Content Management System, and it streamlines image storage for the Email & Landing Page Builders.
Enabling CMS involves two steps: Setting up the CMS and selecting the channel for the email builder.
5 Questions
Before you start, you need to do a little planning.
Here are five questions to ask your team:
>Who needs access to the email builder and CMS?
>What do you want to name your CMS workspace?
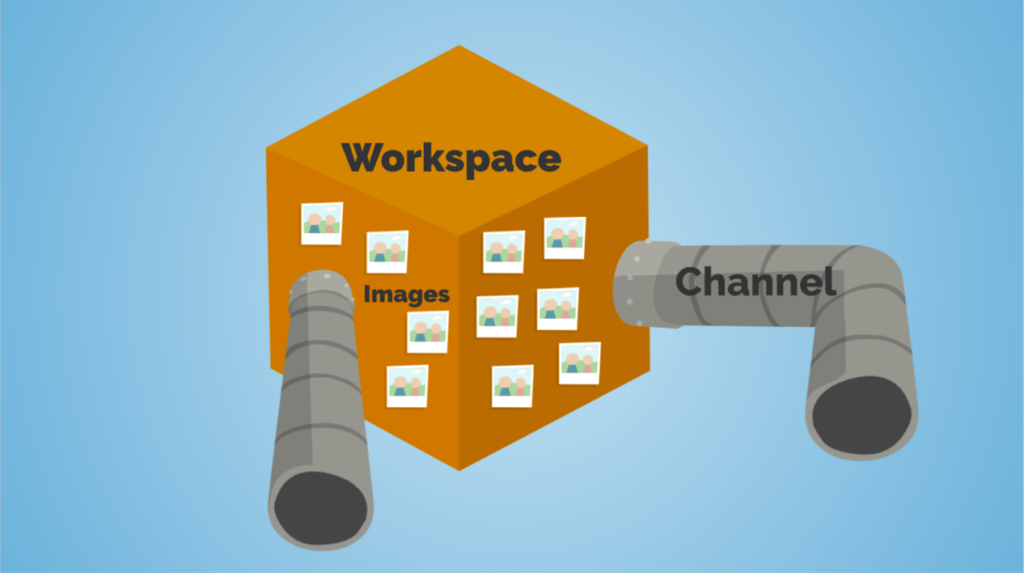
A workspace is the primary organizing and security principle in CMS. The workspace holds your images and defines which users are allowed access. You cannot delete workspaces, but you can rename them. I suggest a name like “Images.” More on workspaces here.
>What do you want to name your CMS channel?
A channel lets you share content in your CMS workspace with other endpoints. You can create channels to connect to the Account Engagement email builder and other destinations like Landing Page Builder, Commerce Cloud, Marketing Cloud, Heroku or other third-party site using APIs. I suggest a channel name like “Account Engagement.” More on channels here.
>What role do you want to assign your marketers in CMS?
You have two options:
Content Admin – This role has full access to the workspace and can manage contributors, languages and sharing.
Content Manager – This role has full access to the workspace
>What language?
You have a choice of 18 different languages.
Open CMS
Go back to Salesforce > Setup > Content Setup, and select “Open CMS.”

Now that you have answers to your planning questions from an earlier step, you can breeze through the CMS set up with the wizard. (High five!)
The first step is going to the CMS Workspace and selecting “Create Workspace.”
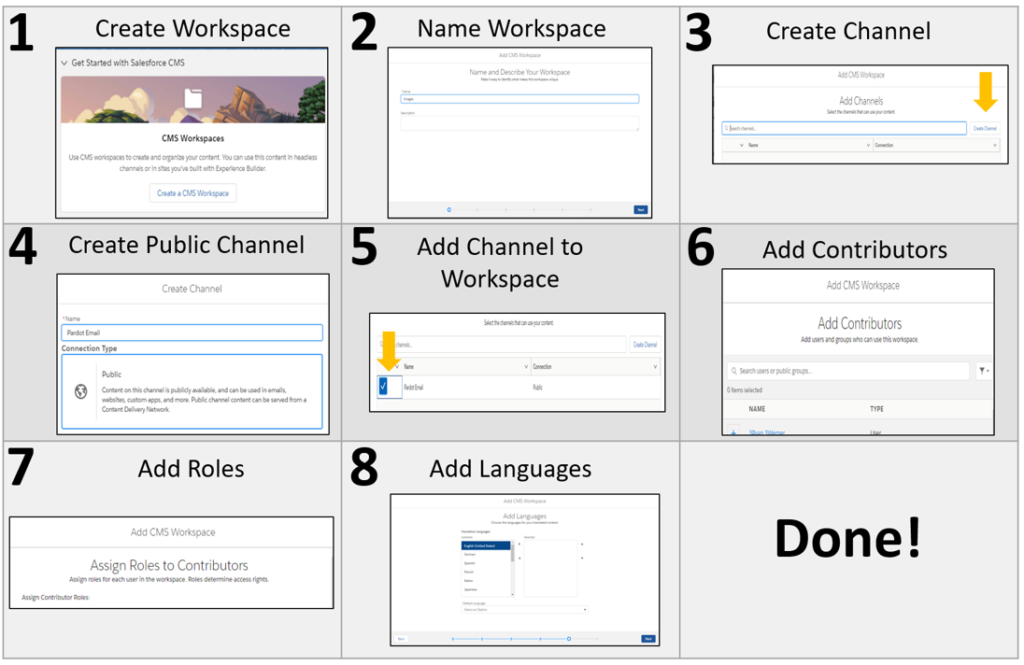

STOP! PAY ATTENTION HERE!
You still need to add the domain to the channel. Go to the App Launcher and select CMS Channels.
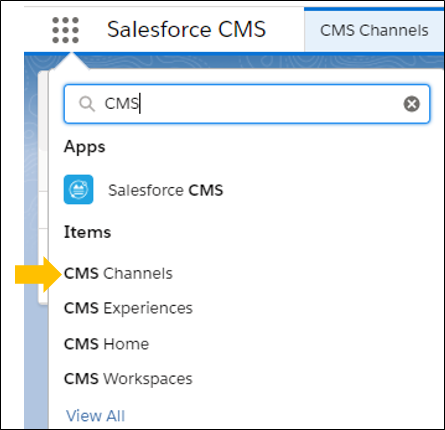
Choose “Edit” on the right.

Select Domain on the left and “Enable Domain.” Choose the appropriate domain in the dropdown.

NOTE: You need to have My Domain set up for the default CDN domain to appear. Go here to set up My Domain. (Older instances may not have this enabled.)
Select a channel to use when designing email content
Go back to Salesforce > Setup > Content Setup and choose “Select Channel.”

This is the easiest step! Choose your channel in the dropdown.
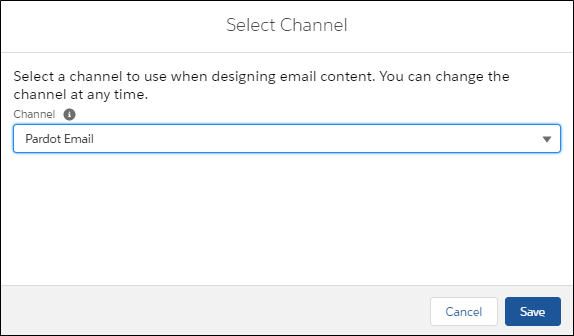
You’re Done! Now you can add images to your new CMS workspace!
4. Folders and Enhanced Sharing
One more thing! Make sure that you have folders and enhanced sharing enabled.
In Salesforce, go to Setup > Lightning Email Templates

Almost there!
Go back to Salesforce>Setup and type “App Manager” to add the new items to your navigation. Here are the steps:
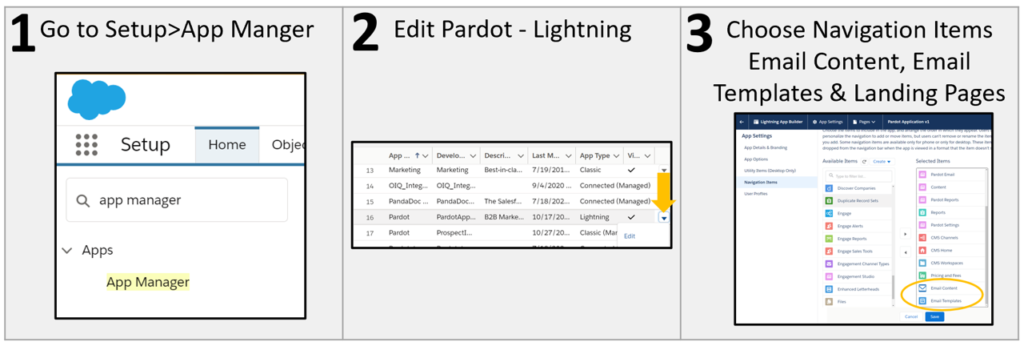
Then go back to Account Engagement for Lightning app. Add Email Content, Email Templates and Landing Pages to your navigation bar with three steps:

Select “Add to Navigation” and “Save.”
You should see the new items on your navigation bar at the top.

5. Double-Check
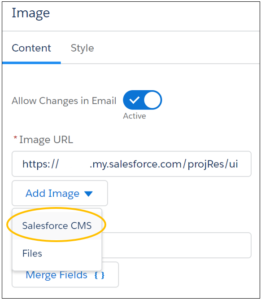
If the CMS is set up correctly, you should be able to select “Salesforce CMS” in the email template tab when adding images.
Troubleshooting
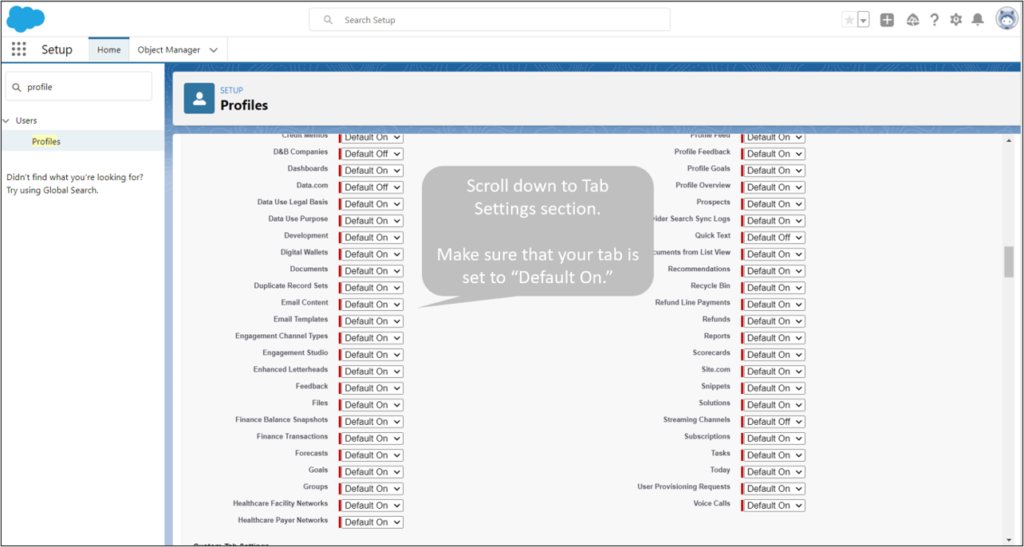
If you cannot see the tabs (Email Templates, Email Content or Landing Page), you probably need to change the tab settings. Read more here.
Go to Setup > Profiles
Choose the desired profile and select “Edit.”
Scroll to Tab Settings section. Find the desired tab and check the setting. It should be set to Default On.
More
Other helpful Email Builder blogs:
Account Engagement Email Content – Email Sending Gotchas
Account Engagement Email Builder – Explore Your Image Hosting Choices
Email Content – See Your Email Metrics


