My grandfather used to say, “If you have a talent, use it.”
His sage advice holds for B2B Marketing Analytics: If you have it, use it.
Many companies have B2B Marketing Analytics (B2BMA), but it’s not enabled because they don’t know it exists, or the setup is often challenging. (Setup is the #1 question Salesforce gets about B2BMA.)
B2BMA is a reporting tool that gives you insights into your marketing performance. It’s included in Account Engagement Plus, Advanced and Premium editions. Check out the Account Engagement tiers here. (Scroll down and expand “Supercharge your marketing automation”)
Follow the steps below for a breezy B2BMA implementation experience.
A couple things first
Let’s get this B2BMA party started.
First, go to Account Engagement Settings > Account Settings and jot down your Account Engagement Account id. (This is how B2BMA connects to your Account Engagement data.)
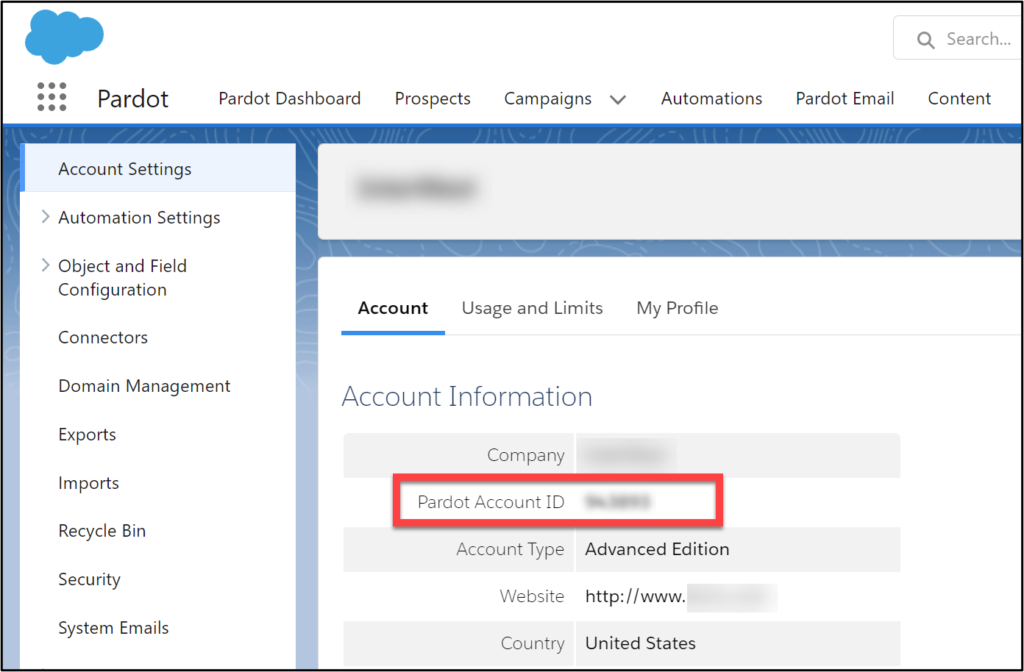
While you’re in settings, check your connector user. You can find it when you navigate to Account Engagement Settings>Connector>Salesforce.com connector>Edit Settings.
If you are still using a v1 connector, consider upgrading to v2 (b2bmaintegration). Learn more here.
Take note of your connector user because you need to add a license and permission set to this user in the next step.

Get started with B2B Marketing Analytics
Salesforce has a set up wizard!
Go to Setup > Analytics > B2B Marketing Analytics > Getting Started
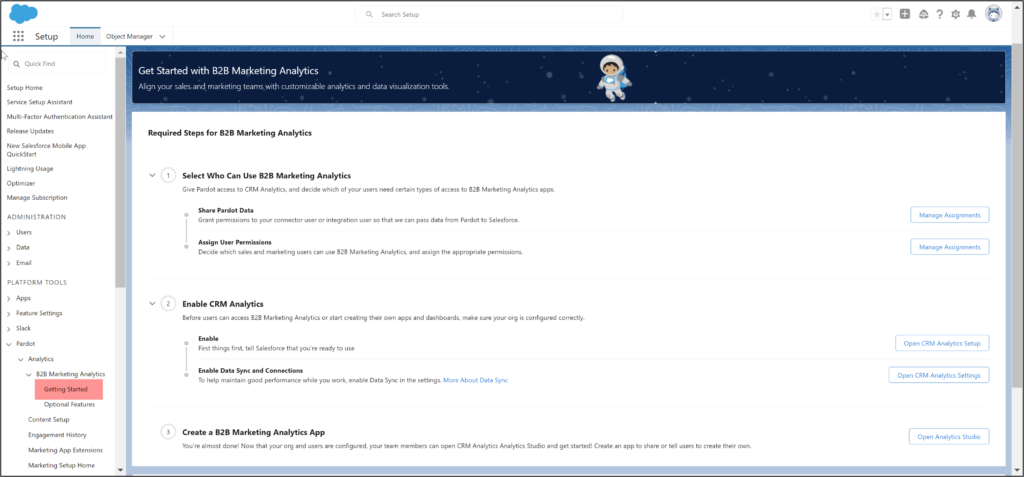
1. Select Who Can Use B2B Marketing Analytics
Under Sare Account Engagement Data, select “Manage Assignments.”

Add the B2BMA Integration User (Filter under the letter “I”)

Next, choose “Assign User Permissions” and add any user who needs access to B2BMA. (It’s the same permission set.)

Each user should have the B2B Marketing Analytics permission set and a License Assignment.
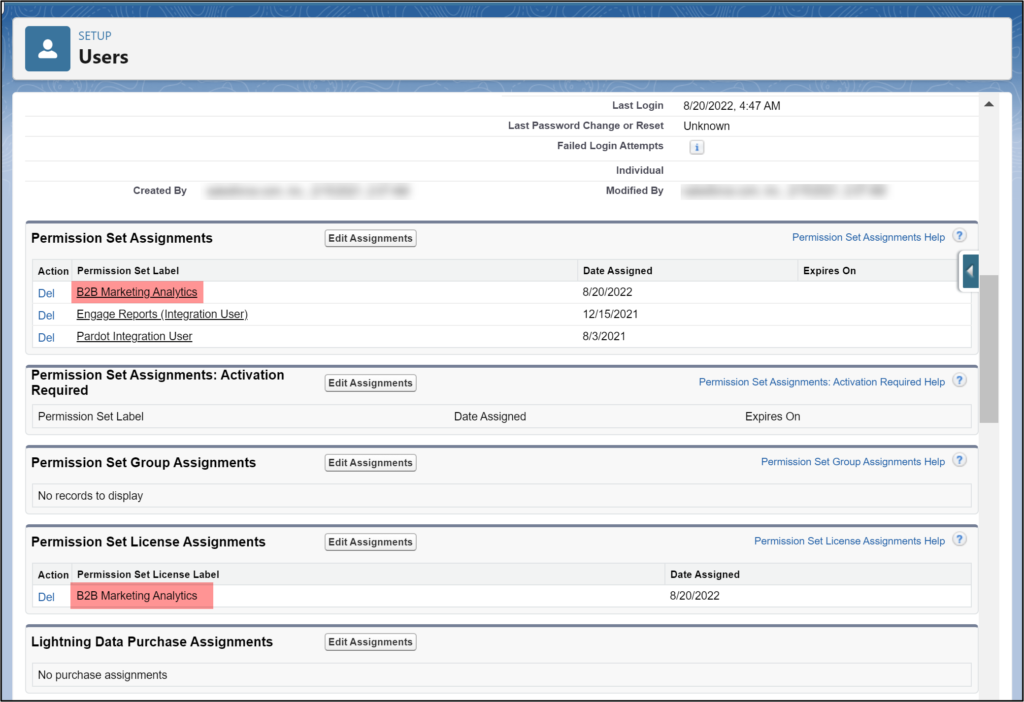
NOTE: Your Account Engagement may have a different name for these permissions (like Analytics Embedded App) based on the creation date of your Account Engagement instance, but the concept is the same. If you have the Analytics Embedded App permission set license, you must create custom permission sets. To give managers and users access to apps, make two permission sets and name them Manage Analytics Templated Apps and Use Analytics Templated Apps. More here on page 2.
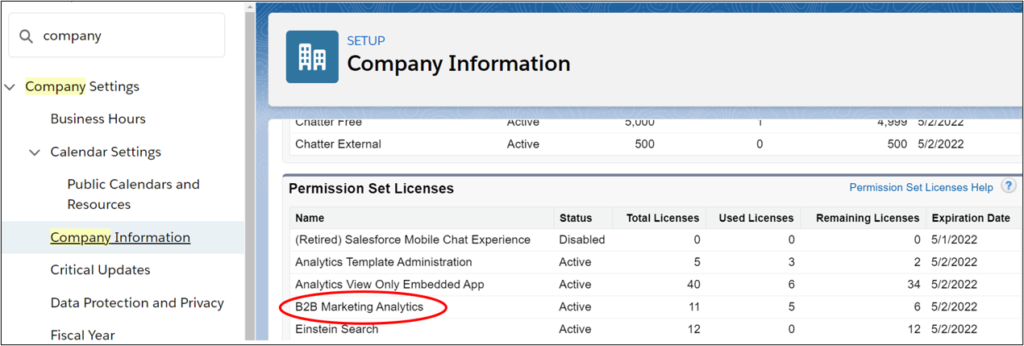
You have a limit on your B2BMA licenses. Go to Setup>Company Information to see how many licenses you have. Most companies have 5 to 10, or if you have business units, you may have 11 licenses. It depends on your Account Engagement edition.
2. Enable CRM Analytics
Now, go back to the wizard and under “Enable” choose “Open CRM Analytics Setup.”

Enable the app and follow the wizard.
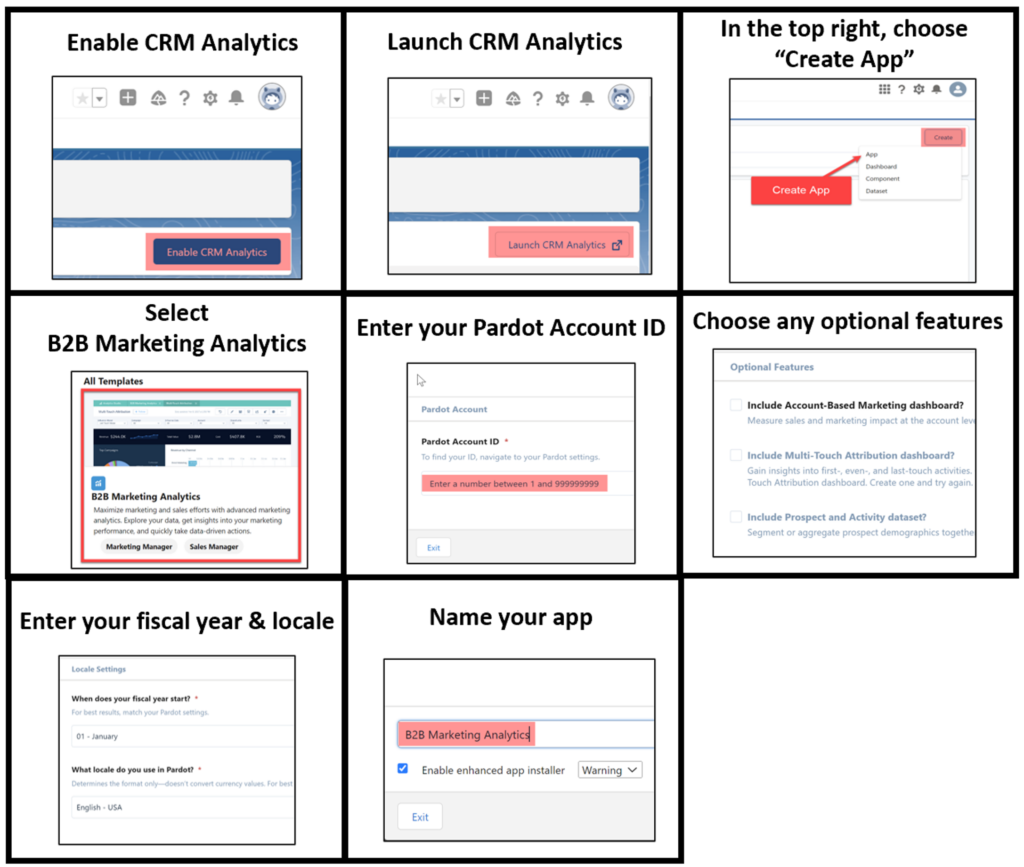
Now go back to the wizard and choose “Open CRM Analytics Settings.”

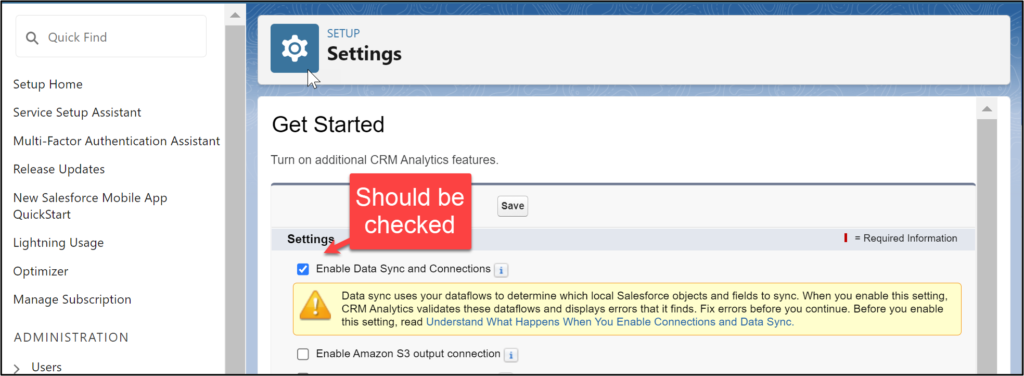
3. Create a B2BMA app
You can go back to the wizard and open the analytics studio and get started!

4. Error Messages
Ugh. Those pesky error messages! Occasionally, you may get error messages like the following:
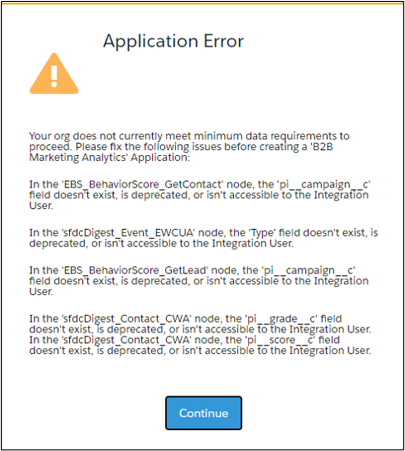
This means that you need to give your connector user the necessary access. Read the error message carefully and go to the respective Salesforce object and field to adjust the field security settings.
Viola!
Prerequisites
Wait, don’t forget about prerequisites to get the most out of your B2BMA app:
• Account Engagement for Lightning
• Connected Campaigns
• Advanced Campaign Influence
• Engagement History
• Engagement History Custom Report Types

