I’ll walk you through the steps of importing prospects.
First, go to Account Engagement Settings tab and select Imports on the left side.
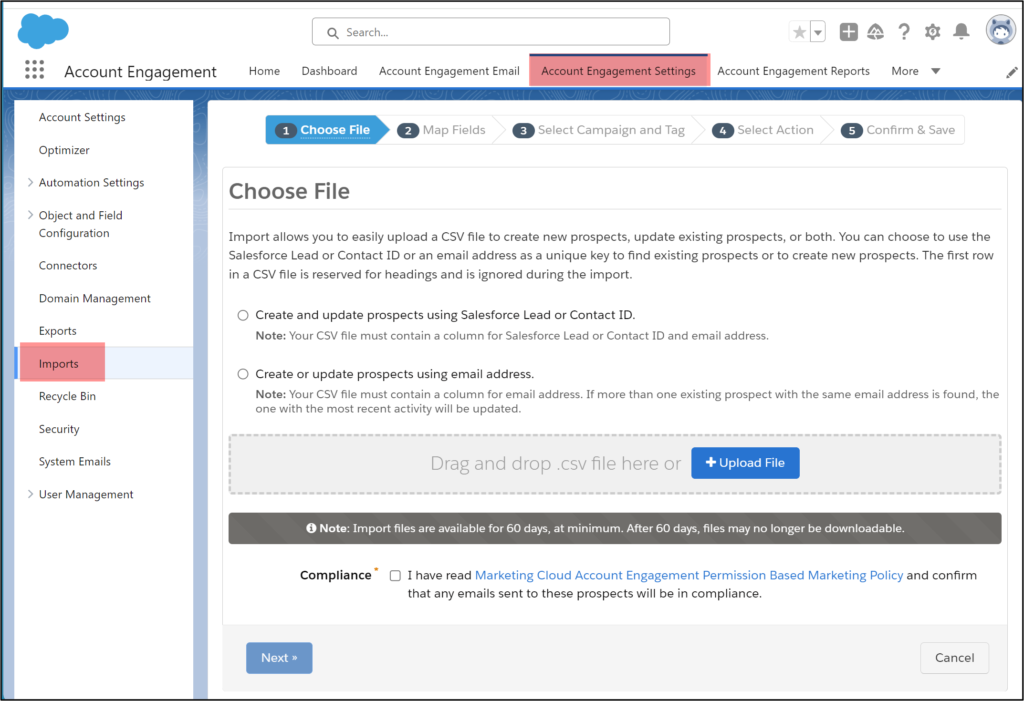
Prepare your spreadsheet and save it as a .csv file. If you are grabbing prospects from Salesforce, ALWAYS include the CRM ID (column A). You can upload the file or drag it into Account Engagement.

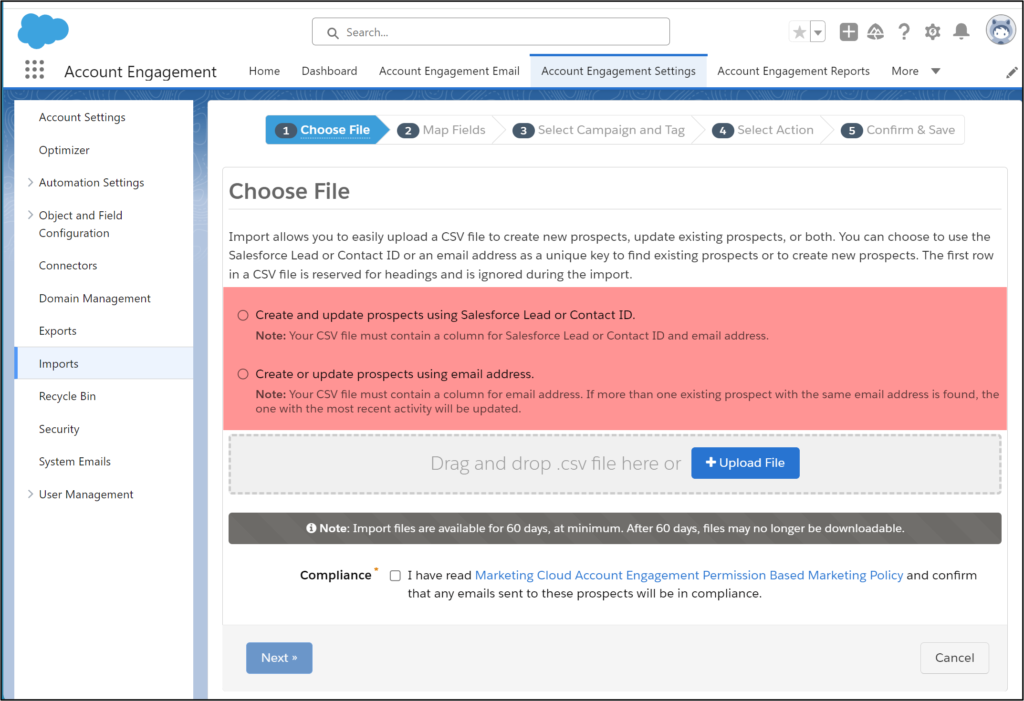
As you proceed with the import, you must choose “Create and update prospects using Salesforce Lead or Contact ID” or “Create or update prospects using email address.”
Create and update prospects using Salesforce Lead or Contact ID – You should always try to use this choice when you upload. It uses the CRM ID to sync with Leads or Contacts in Salesforce. If this is not selected and you have duplicate Leads or Contacts, the system will sync the record with whichever Lead or Contact was most recently updated (which may not be your intended record).
Create or update prospects using email address – Use this choice when you don’t have a CRM ID. For example, you have names and contact information from a trade show and want to import them into Account Engagement. Of course, the trade show doesn’t have your CRM ID so you have no choice but to import with email address.
You must check that you have read and confirmed compliance with the Marketing Cloud Account Engagement Permission-Based Marketing Policy. This ensures that you only email prospects who have agreed to receive your emails.

Map Fields
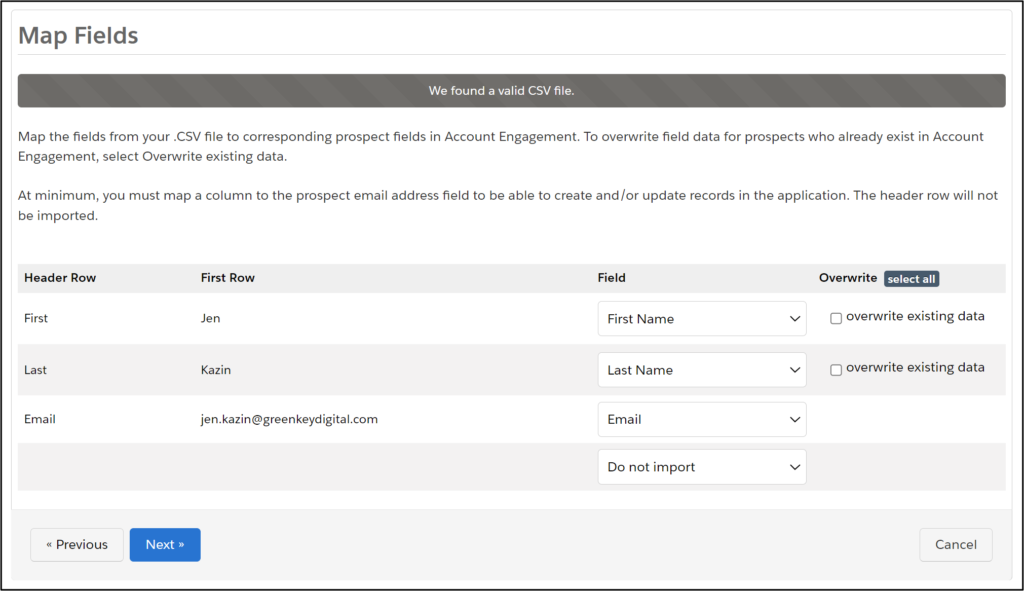
The next screen allows you to map your fields. Make sure the system auto-matched to the correct Account Engagement fields. You can also check if you want to overwrite existing data. For instance, if a prospect already exists in the system as Jennifer, and you choose “Overwrite existing data,” the system will update the first name to “Jen.”
Select Campaign and Tag
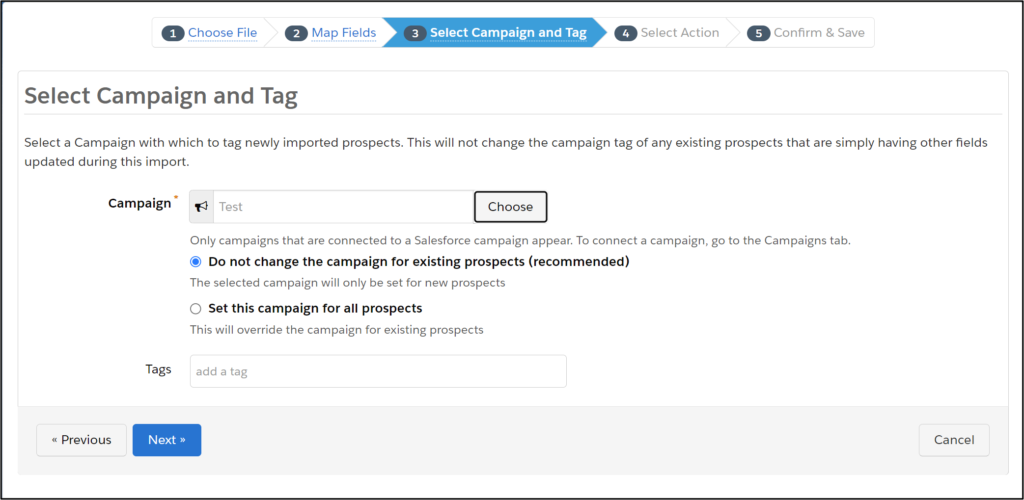
The system will ask you to choose a campaign. This is the Source Campaign. If prospects have never been in your system, they will be marked with your chosen value.
Do not change the campaign for existing prospects – This setting will only populate Source Campaign if this is the first touch for the prospect. For instance, if you import a prospect who has never been in any of your systems, Account Engagement will set the Source Campaign.
Set this campaign for all prospects – If you select this, ALL imported prospects’ Source Campaign will update.
NOTE: In either setting, this does NOT populate the prospect into campaigns as campaign members. You still need to build automations or import Leads or Contacts to add them as campaign members.
Select Action
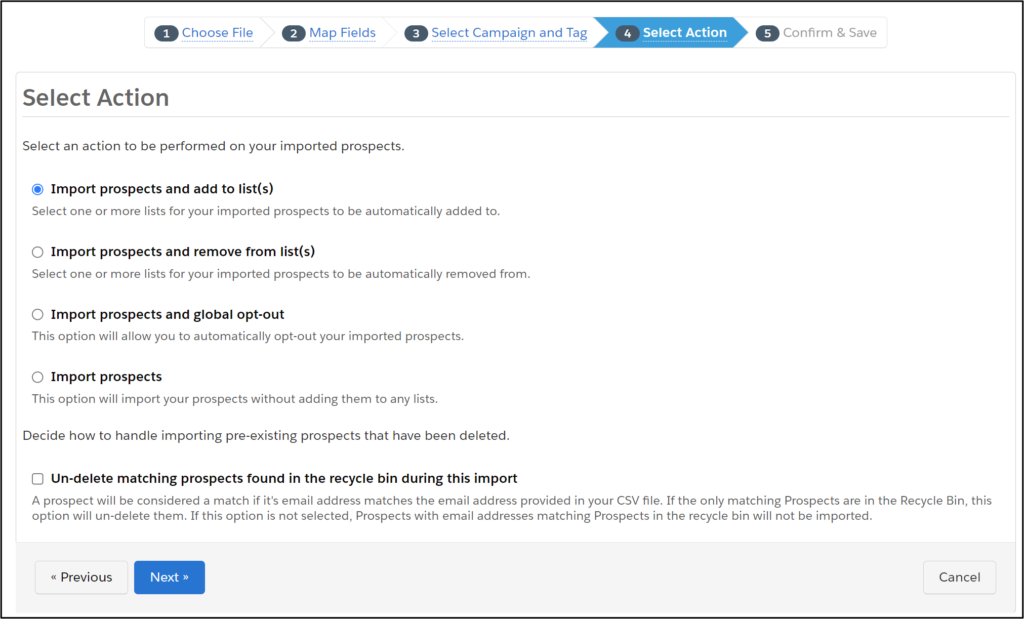
You have many choices in this section. Most often, marketers are importing prospects and adding them to a list. “Import prospects” and “Import prospect and global opt-out” are typically used when migrating marketing automation platforms.
Pay attention to the “Un-delete matching prospects found in the recycle bin during this import” setting. You will want to check this if you believe you might have matching prospects that were previously deleted and in the recycle bin.
Confirm and Save
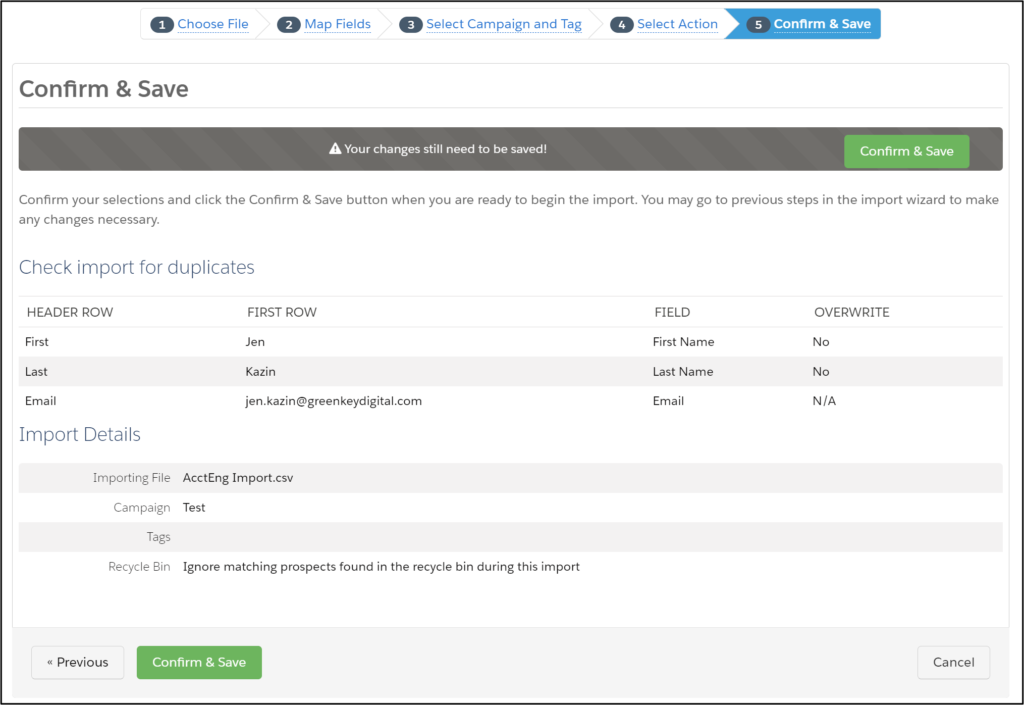
Almost done! Check that everything looks ok and hit “Confirm and Save.”
