Let’s get your Sending Domain setup!
Sending Domain
A sending domain indicates who an email is from via the “From” email header. Your IT person can configure the DNS records for a sending domain, which allows recipient mail servers to authenticate your messages.
For instance, if you use Email Sender jen.kazin@greenkeydigital.com, “greenkeydigital.com” is the sending domain.

Domain Setup
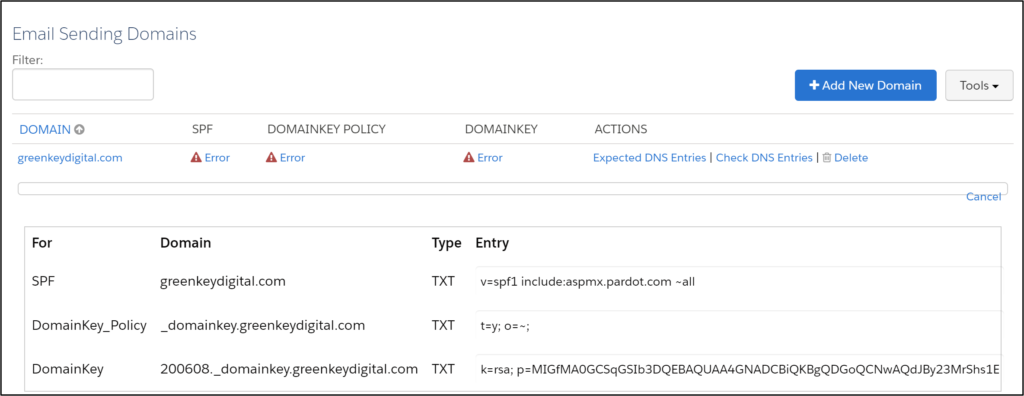
Your IT person will need to add TXT records to your sending domain’s DNS record.
DNS stands for Domain Name System. It translates human-readable domain names (for example, www.cnn.com) to machine-readable IP addresses (186.3. 4.67).
If your company has multiple domains, your IT person must configure each domain.
With Account Engagement (Pardot), you can send emails from your domain by authenticating through two widely accepted email authentication standards: Sender Policy Framework (SPF) and DomainKeys Identified Mail (DKIM).
Most ISPs and corporate spam filters check for one or more of these types of authentication when determining whether to allow emails to a recipient’s inbox.
Each DNS system is different, and your IT team will need to handle the specifics of each provider.
Verify your domain
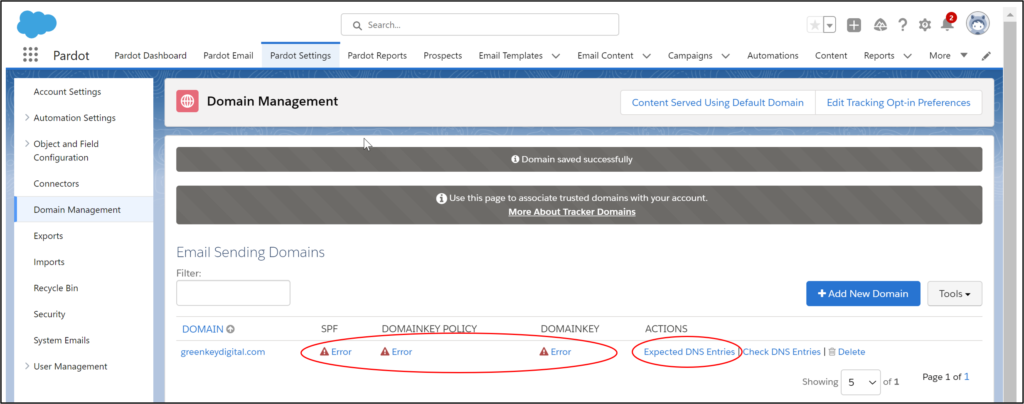
Go to Account Engagement Settings and Domain Management. Click on “Add New Domain.
Type in the domain.
You will see three red errors.

Click on the Expected DNS Entries link to see what Account Engagement (Pardot) expects us to do.

Create text (TXT) records in your email hosting server.
Adding the TXT records tells email servers that your email is safe. Salesforce has a great video of the process.
Without this authentication, your email recipients might see a message that the email sender is not trusted and that they should be careful moving forward.
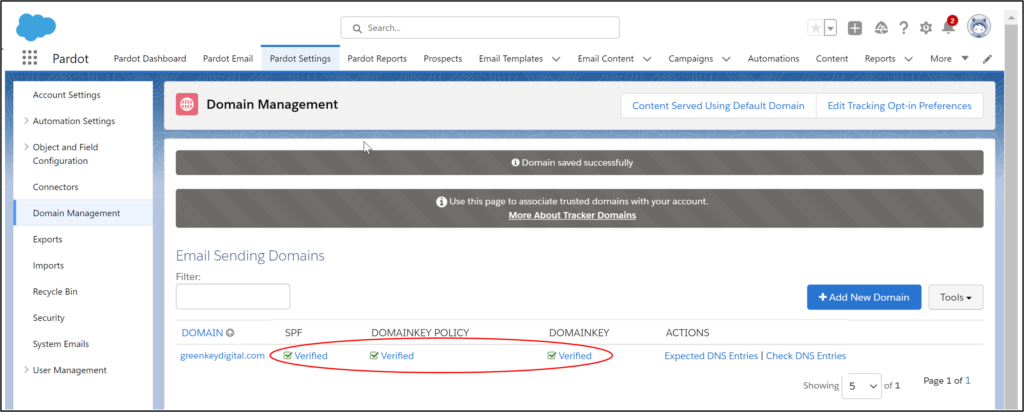
Verified
Once the proper TXT records are added to your DNS, click “Check DNS Entries.”
You should see all green checks to confirm you are verified.

Resources
Salesforce Recording – How to Configure Your Account Engagement Email Sending Domain

