Salesforce is now granting an extension to select Opted Out Sync behavior. After your request the extension, you have until Jan 15, 2024 to select a sync behavior for the Opted Out field. If you don’t select a sync behavior before Jan 15, 2024, the field stops syncing with Salesforce until you make a selection.
If you don’t request the extension, you have until November 15, 2023 to make an update or the field stops syncing with Salesforce.

Taking Action
If you don’t take action by November 15, 2023, the Opted Out field will be UNMAPPED and stop syncing with Salesforce. (Ugh!)
New business units created after November 15, 2023, will default the sync behavior to “Use Account Engagement’s value.”

What to pick?
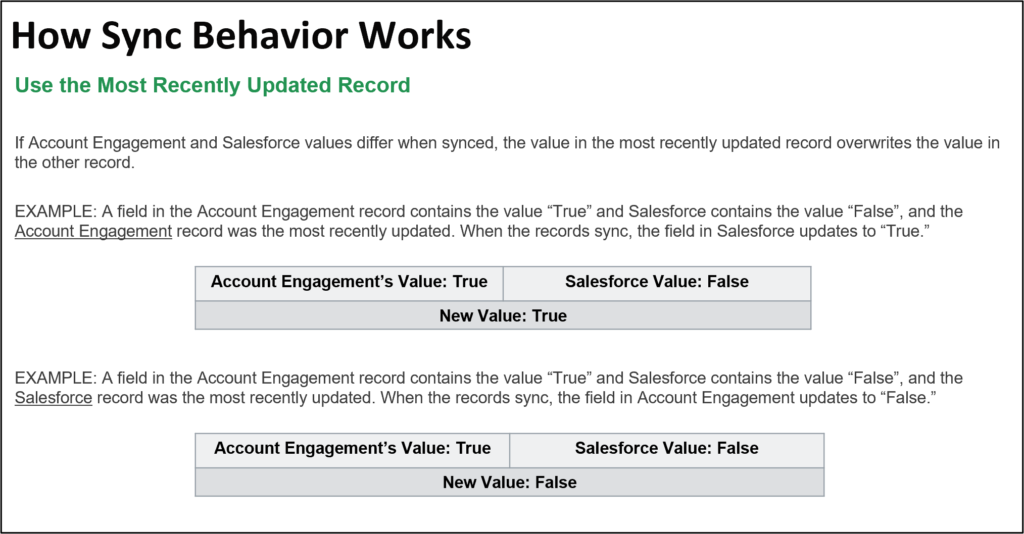
That’s a good question. Most instances are currently set to “Use the most recently updated record,” and most marketers will want to continue to keep that setting.
Here’s what “Use the most recently updated record” means:

Updating the Opted Out Field
To keep the functionality of “Use the most recently updated RECORD value,” you need to set the history tracking in the Lead and Contact objects for the Email Opt Out field in Salesforce. Then, in Account Engagement, edit the field and choose “Update the Most Recently Updated FIELD value.”
It’s easy to do, but you must have Salesforce Administrator access.
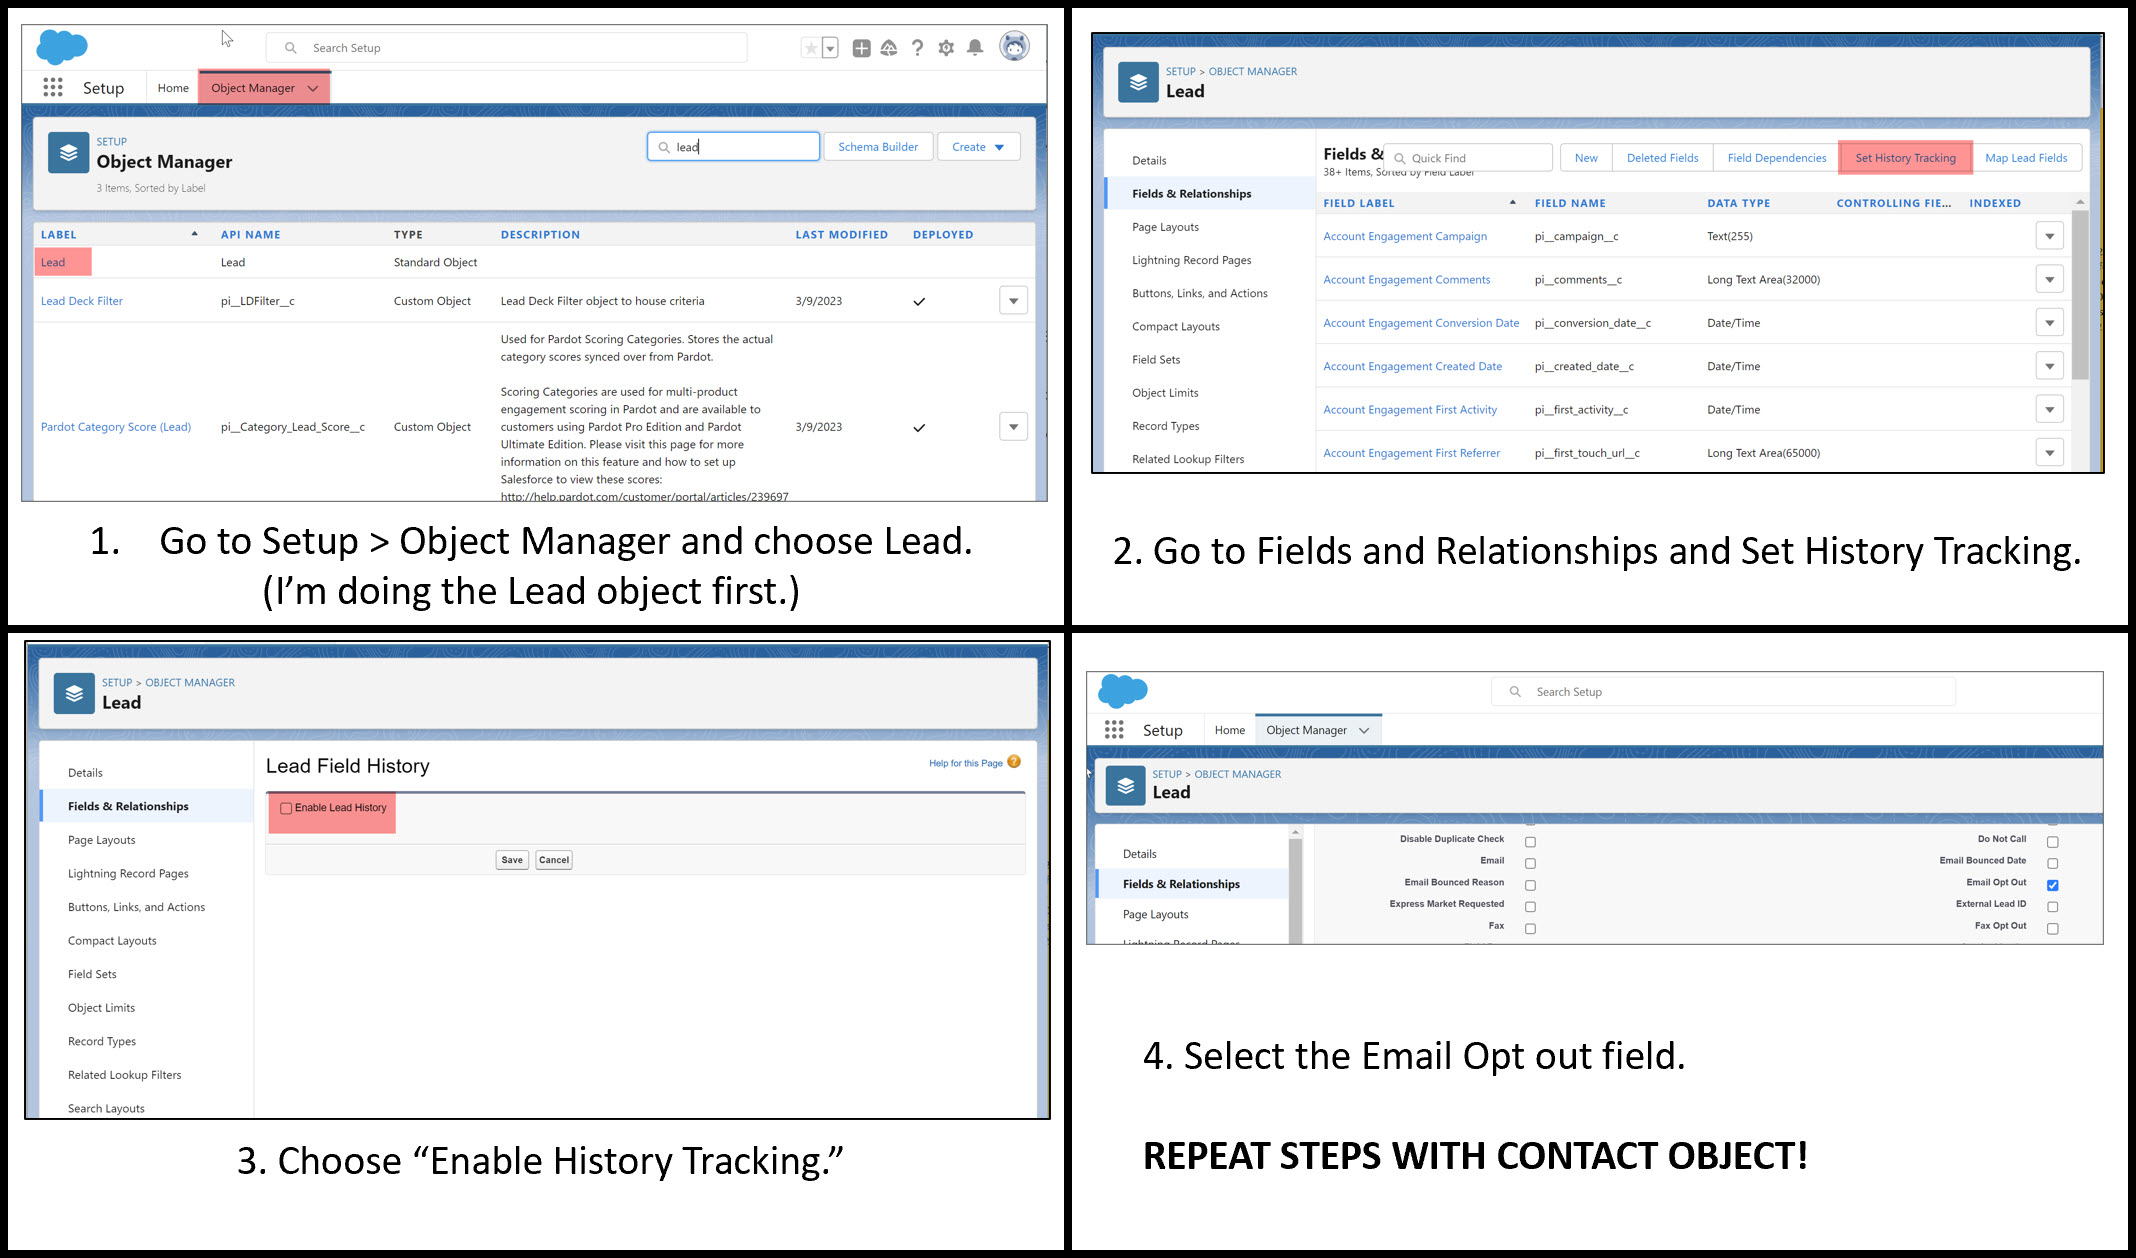
1. Salesforce – Set History Tracking
First, you need to set the History Tracking in the Lead and Contact objects.

Make sure to select Email Opt Out field in the Set History Tracking section. (You can choose up to 20 standard and custom fields per object.) Whenever a user modifies any of the selected fields, the old and new field values are added to the History related list and the date, time, nature of the change, and user making the change.
2. Account Engagement – Update Opted Out Field
Once you have the Field History enabled, go back into Account Engagement and edit the Opted Out field sync behavior to “Use Most Recently Updated Field Value.”
- Go to Account Engagement > Object and Field Configuration > Prospect Fields.
- Click on the prospect default field Opted Out.
- Click Edit default prospect field.
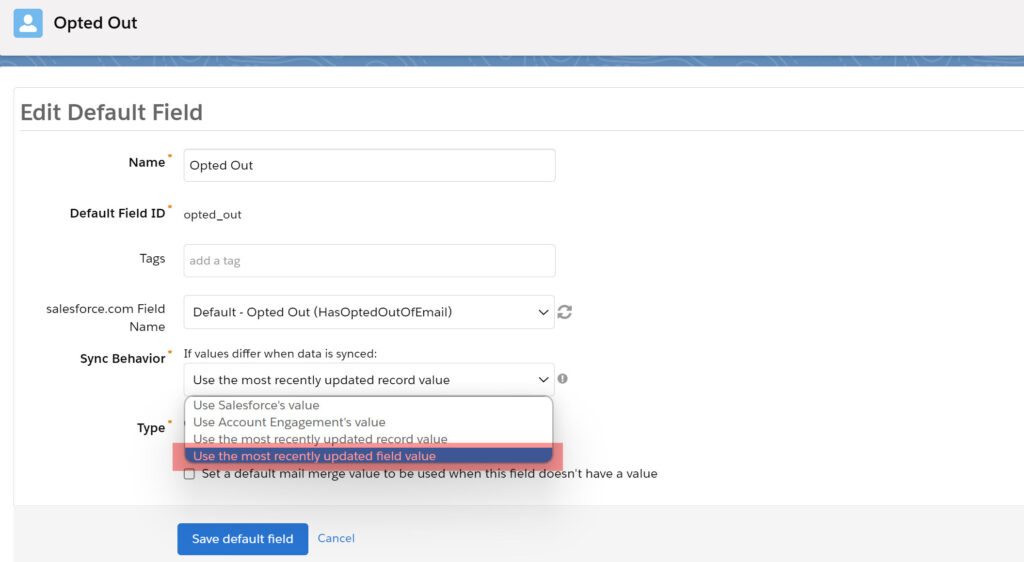
- For Sync Behavior, select “Use the most recently updated field value.”
- Save
Updating Opted Out Sync Behavior to Use the Most Recently Updated Field Value
If you want to watch a video of the process, click here.
Attend my office hours if you have any questions.
Read more in the official Salesforce documentation here.
STOP!
Most marketers are done at this point. IF, for some reason, you want to use Account Engagement or Salesforce value for the sync behavior, keep reading. But 98% of companies will likely choose “Use the most recently updated field value.”
Use Account Engagement (Pardot) Value or Salesforce’s Value
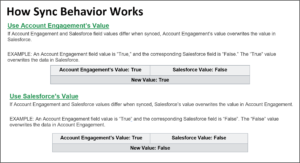
If you consider using Account Engagement (Account Engagement) or Salesforce’s value for the sync behavior, review this graphic to understand how it works.

Salesforce goes into more detail in it’s Account Engagement Opted Out Sync Behavior Overview
Use Salesforce’s Value
Select Use Salesforce’s Value in the drop-down if you want Salesforce to be your source of truth for the Opted Out field. Beware! This means that if Account Engagement and Salesforce have differing values, Salesforce will override Account Engagement.
For instance, if a prospect unsubscribed to your emails, Account Engagement will mark that prospect as Opted Out, but then Salesforce will override it minutes later.
An example of a company that might select “Use Salesforce’s Value” uses multiple email systems. In this case, using a custom object in Salesforce as a source of truth for unsubscribed prospects makes sense.
Use Account Engagement’s Value
Most companies will select “Use Account Engagement’s Value” when they want Account Engagement to be the system of record for Opt Outs.
In this scenario, when a prospect unsubscribes, Account Engagement marks the prospect as Opted Out and updates Salesforce. If a salesperson tries to change the Email Opt Out field in Salesforce, Account Engagement will override it.

